When programming drum beats in Reapers midi editor there are several ways to help our workflow.
Shortcuts, Screen Setup, Drum Maps etc.
Below I’m going to show you how I have my Drum Editor setup and what I do to make creating beats easier and much more fun.
Some of this can take time to get up and running and some of it might not be necessary or conducive to your personal studio setup.
Let’s first look at the screen editor:
Click images to open full size.
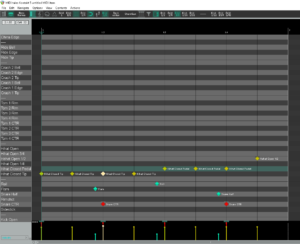
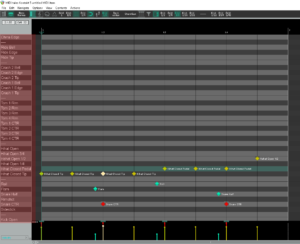
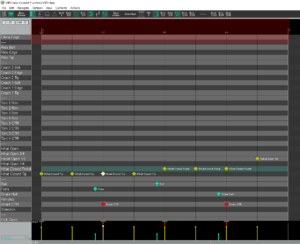
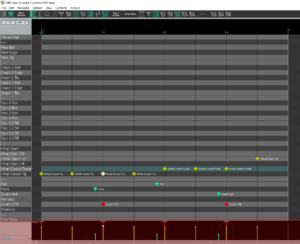
My drum editor screen is set up in a manner that allows me to edit faster and a more intuitive way – this is of course my own set up and you can and should alter or edit to suit your needs or workflow.
The elements of my editor are as follows:
To the left of the screen I have my drum note names – these can be loaded via a file on entered manually using double clicking on the key itself. The piano roll view is changed in two ways.
View – Mode – Named Notes
or
Alt+2
Notes viewed as ‘diamonds’
View – Piano Roll Notes – Diamonds(Drum Mode)
or
Alt+D
Naming the notes of our piano roll and viewing in this way helps us to stop having to audition to find the hits we want to enter.
Some VST drums come with a drum map or you can create your own by manually entering the notes using right double click on your mouse and saving the file via
File – Note/CC names – Save note/cc names to file…
We can also load files from the same:
File – Note/CC names – Load note/cc names from file…
Now we can choose the option:
View – Hide/Shiw note names – Hide unused and unnamed notes
In my setup I have gone a little further.

As you can see above I have stacked my drums in groups – kicks – snares – hihats – toms – crash – ride etc
I have also put in dividers to make it easier for my old eyes.
To do this I had to remap the keys and to do this without messing up Kontakt I used a Reaper js plugin called: JS: MIDI Map to Key v2
This plugin is inserted before Kontakt so that any midi note values passed from my editor to Kontakt is redirected if you will.
I have to files for this.
One is my midi note names file which is the list shown above and the second file is a drum map for JS: MIDI Map to Key v2 which remaps my Drum Editor to Kontakt.
This seemed to me to be the tidiest way of doing this without editing Kontakt.
Zipped file available here:
Once downloaded you can see how this works by copying each file to it’s required destination.
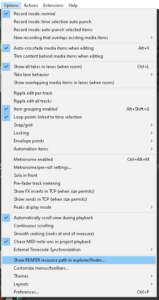
In Reaper find the resources folder: Options – Show REAPER resources path in….
Once that folder is open find MIDINoteNames and copy & paste RermappedKontaktDrums.txt
Now look for – Data/ix_keymaps and copy & paste StudioDrumsMIDI Remap.txt
RermappedKontaktDrums.txt is loaded into editor via File….
StudioDrumsMIDI Remap.txt is loaded into JS: MIDI Map to Key v2
Creating these files for yourself is pretty easy:
# MIDI note/CC name map
78 Cowbell Muted
77 Cowbell Open
76 Cowbell Muted
75 Cowbell Open
74 —
73 Tamb Shake
72 Tamb
71 —-
70 Clap
69 Claps
68 Sticks
67 —-
66 Splash Edge
65 China Tip
64 China Edge
63 —-
62 Ride Bell
61 Ride Edge
60 Ride Tip
59 —–
58 Crash 2 Bell
57 Crash 2 Edge
56 Crash 2 Tip
55 Crash 1 Bell
54 Crash 1 Edge
53 Crash 1 Tip
52 —-
51 Tom 1 Rim
50 Tom 2 Rim
49 Tom 3 Rim
48 Tom 4 Rim
47 Tom 1 CTR
46 Tom 2 CTR
45 Tom 3 CTR
44 Tom 4 CTR
43 —-
42 Hihat Open
41 Hihat Open 3/4
40 Hahat Open 1/2
39 Hihat Open 1/4
38 Hihat Closed Pedal
37 Hihat Closed Tip
36 —-
35 Roll
34 Flam
33 Snare Half
32 Rimshot
31 Snare CTR
30 Sidestick
29 —-
28 Kick Open
27 Kick(damp)
You can edit this file yourself if needed. Remember to save it in you MIDINotenames folder so that Reaper can see it to load.
The next file to edit is the one required by JS: MIDI Map to Key v2
//Key Mapping File. Change the number at the beginning of the line to set the output note.
//Octave 0
0 (0) C
1 (1) C#
2 (2) D
3 (3) Eb
4 (4) E
5 (5) F
6 (6) F#
7 (7) G
8 (8) G#
9 (9) A
10 (10) Bb
11 (11) B//Octave 1
12 (12) C
13 (13) C#
14 (14) D
15 (15) Eb
16 (16) E
17 (17) F
18 (18) F#
19 (19) G
20 (20) G#
21 (21) A
22 (22) Bb
23 (23) B//Octave 2
24 (24) C
25 (25) C#
26 (26) D
36 (27) Eb
60 (28) E
12 (29) F
37 (30) F#
38 (31) G
39 (32) G#
40 (33) A
62 (34) Bb
63 (35) B//Octave 3
13 (36) C
42 (37) C#
44 (38) D
76 (39) Eb
77 (40) E
78 (41) F
46 (42) F#
127 (43) G
41 (44) G#
43 (45) A
45 (46) Bb
47 (47) B//Octave 4
65 (48) C
67 (49) C#
69 (50) D
71 (51) Eb
126 (52) E
48 (53) F
49 (54) F#
50 (55) G
54 (56) G#
55 (57) A
56 (58) Bb
124 (59) B//Octave 5
51 (60) C //Middle C
52 (61) C#
53 (62) D
120 (63) Eb
57 (64) E
59 (65) F
59 (66) F#
119 (67) G
35 (68) G#
34 (69) A
33 (70) Bb
110 (71) B//Octave 6
32 (72) C
31 (73) C#
121 (74) D
30 (75) Eb
29 (76) E
28 (77) F
27 (78) F#
26 (79) G
80 (80) G#
81 (81) A
82 (82) Bb
83 (83) B//Octave 7
84 (84) C
85 (85) C#
86 (86) D
87 (87) Eb
88 (88) E
89 (89) F
90 (90) F#
91 (91) G
92 (92) G#
93 (93) A
94 (94) Bb
95 (95) B//Octave 8
96 (96) C
97 (97) C#
98 (98) D
99 (99) Eb
100 (100) E
101 (101) F
102 (102) F#
103 (103) G
104 (104) G#
105 (105) A
106 (106) Bb
107 (107) B//Octave 9
108 (108) C
109 (109) C#
110 (110) D
111 (111) Eb
112 (112) E
113 (113) F
114 (114) F#
115 (115) G
116 (116) G#
117 (117) A
118 (118) Bb
119 (119) B//Octave 10
120 (120) C
121 (121) C#
122 (122) D
123 (123) Eb
124 (124) E
125 (125) F
126 (126) F#
127 (127) G
You’ll notice that I have highlighted in BOLD the notes that I have remapped – I have used the highest or lowest values and remapped some notes to create spacers highlighted in BOLD
Setting up JS: MIDI Map to Key v2
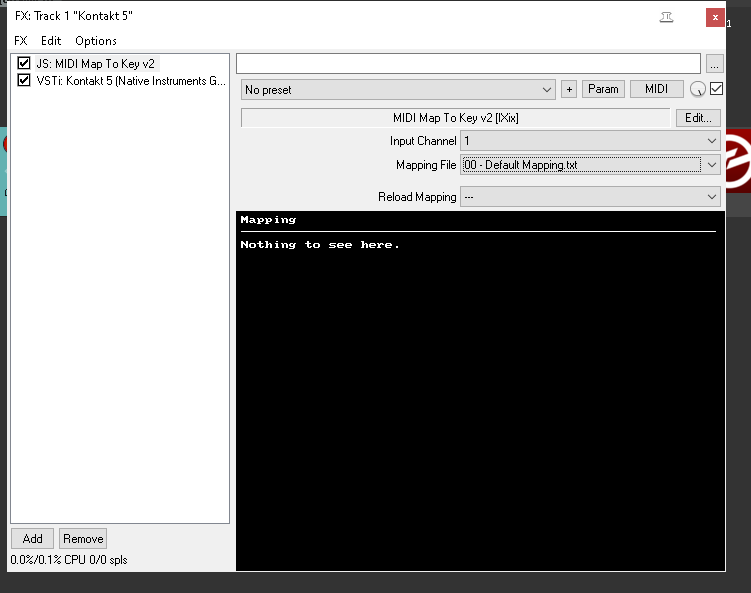
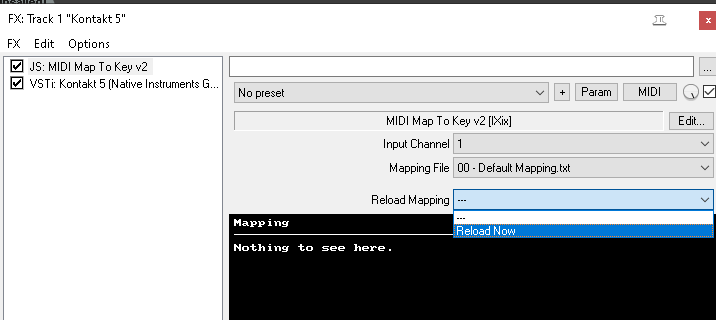
Make sure you load JS: MIDI Map to Key v2 before your drum VST/AU plugin.
Next load Mapping file.
You will then nead to open the Reload Mapping drop down.
Opening this dropdown allows you to reload the mapping file.
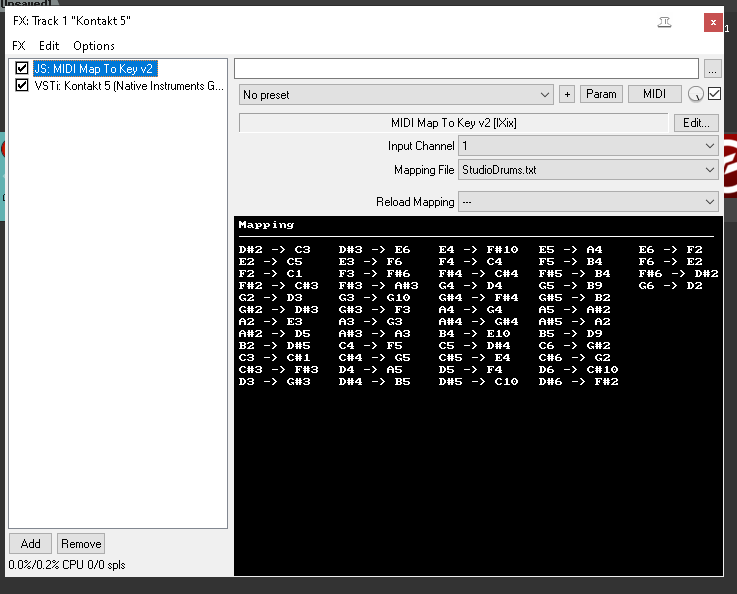
You’re Mapping file when loaded should look like below – if it doesn’t then try reloading(Reload mapping-Reload Now) or check that you have the correct file chosen.
The next step is the ruler – I find it a little small to read especially when I am trying to teach my students how to program drums.
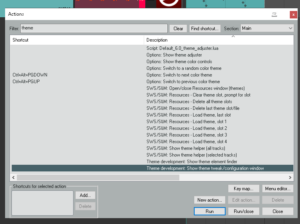
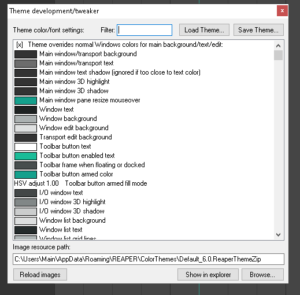
To combat this I use Actions – Theme Development: Show theme tweak/configuration window
Open actions and use the filter bar to search for Theme and then select ‘ Theme Development: Show theme tweak/configuration window’
This screen allows us to change some of our text colours and backgrounds.
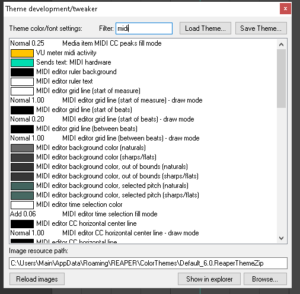
In the filter box type: midi
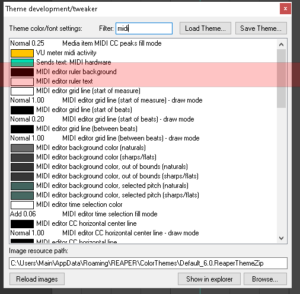
Now we have filtered down to the midi editor – here we can edit colours to make things stand out – In our case MIDI Ruler Background and MIDI ruler text.
Double click to open each option.
I changed text to white and background to black you can choose however you want it to look – there are other options too in regards to the look of the Midi Editor. If you’re not sure leave the rest alone.
Editing notes is the next step – how do we make that step quicker?
In the article below I go through note values pertaining to Reaper’s piano roll/ Midi Editor and it works the same.
Creating a simple drum beat can be seen as below:
We can go further with making editing and entering notes quicker – some are relatively quick to implement others take a bit more work but are worth it in the long run.
Shortcuts for beat lengths are very tidy and make life much easier.
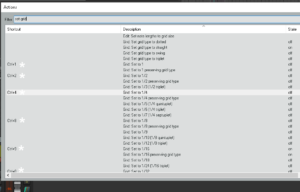
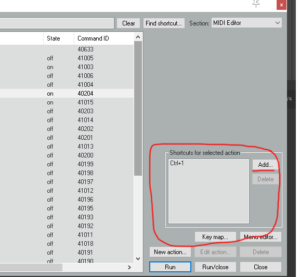
In the image below you can see that I have created shortcuts to change grid settings to allow note length values to be entered correctly by changed the division.
CTRL + 1 = 2 Whole Bar2
CTRL + 2 = Whole Bar
CTRL + 4 = 1/2 bar
and so on….
Our attention though is 1/4 – 1/8 – 1/16 and 1/32
These are what we would typically use in drums – we’ll leave triplets for now.
To creat shortcut – hightlight command – ie Grid: Set to 1/4
Click Add as highlighted below and choose your shortcut – make it memorable.
Velocities
This is where it get’s more in depth for Drum programming and why you would need to use velocity is not really where I want to go in this article rather than how you would enter them.
The simplest way is to enter a note and then use the mouse to drag down that velocity – this can become rather tedious though when editing a lot of Drums. Two solutions are there for us.
- Use the Humanize function in Reaper
- Use Actions, SWS extensions and Shortcuts
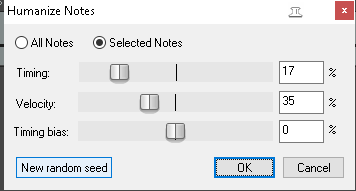
1st option is the easiest and already built into Reaper – using the shortcut ‘H’ you should be able to bring up the mini screen:
This screen allows us add, ‘feel’ to our programmed drums via Timing or Velocity – the percentage values are how much is applied to differentiate from other beats randomly.
Leave the Timing value off or at a low setting and concentrate on experimenting with the Velocity setting.
To only apply to one drum sound ‘Right Click’ that particular drum ie Snare and it will select all of those hits. If all those hits are at 127 drag the value down manually to around 110 and then hit ‘H’ to randomize velocity.
The 2nd option is much more convoluted but allows us to create set velocities with shortcuts which makes editing and creating much more satisfactory.
To install SWS follow the instructions in this video:
Install Reapack:
By installing these two items we can now extend our Reaper interface so that we can do all kinds of nifty tricks including shortcuts for velocities.
Please watch the following video on how to set that up here:
Advanced Short Cuts
Taking things a step further, much further we can use a 3rd party program to allow us to add a 2nd keyboard.
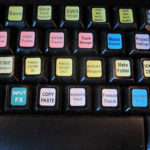
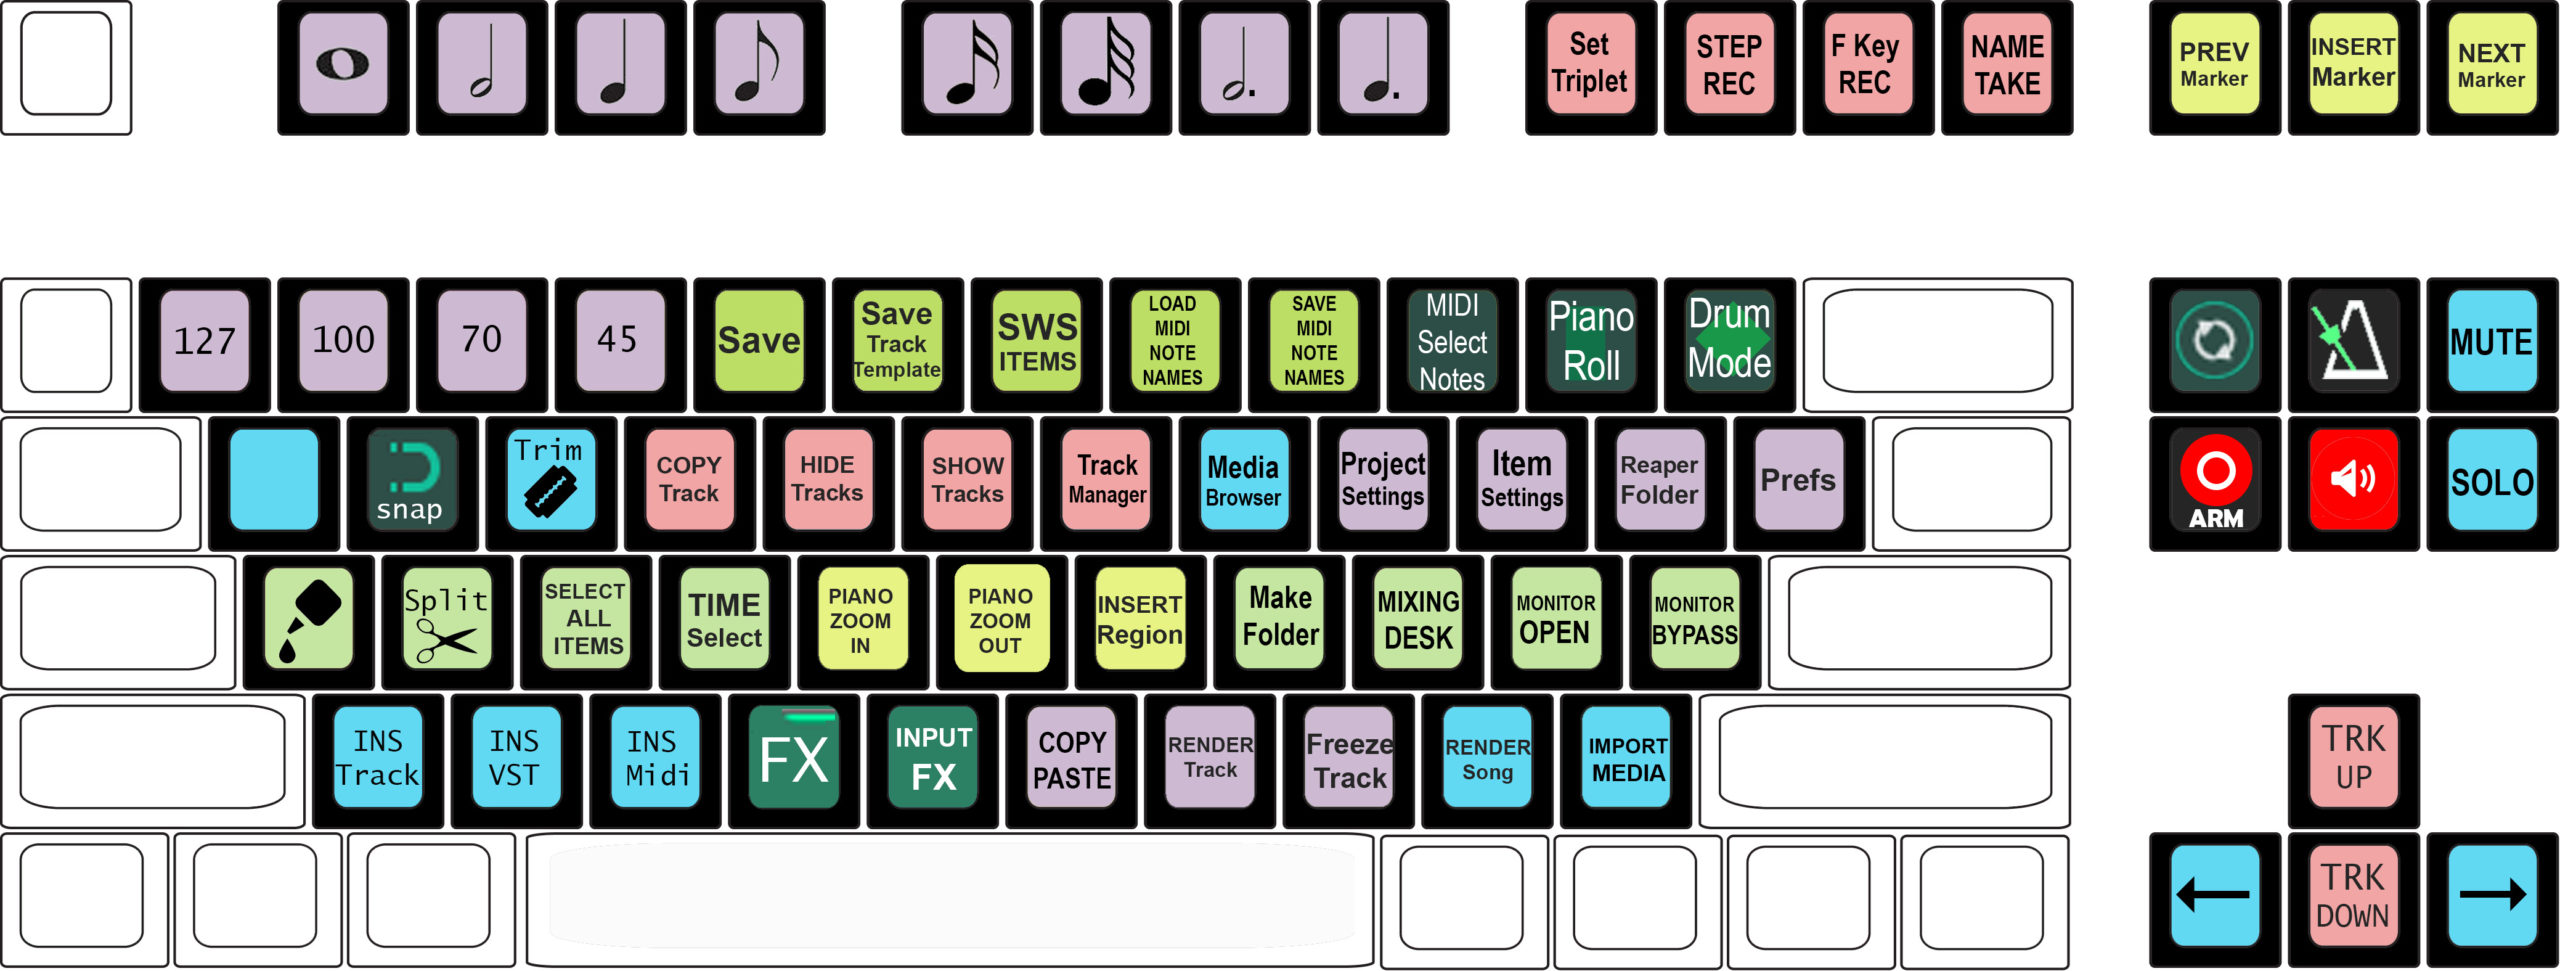
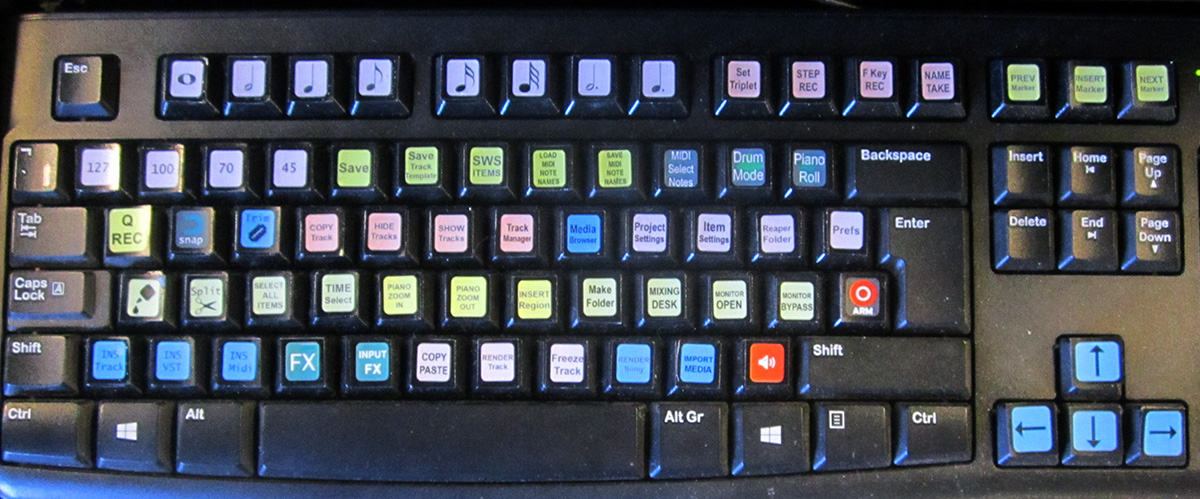
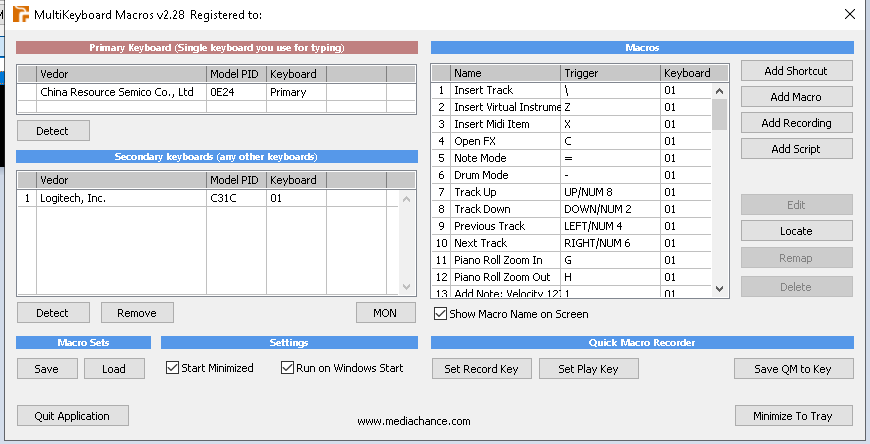
Multi-Keyboard MACROS is a software program that can identify a second keyboard and remap all your combined key shortcuts to one singular key on your second installed keyboard – this keyboard can be then labelled as shown below.
This maybe an extreme solution but by mapping all my frequently used actions/menu items to combined key shortcuts and then remapping them saves me time and energy.
To be as economic and in the moment when editing, recording, mixing or producing is good practice to only use the mouse when absolutely necessary.
Multi-Keyboard MACROS is a good option for this as is HID Macros
Setting up either software is quite simple – there are however a few of things you should take into consideration.
- Your second keyboard should be a different brand – the same brand leads to confusion for the software -also check whether your second keyboard is compatible.
- Do you really need it/Have space? I do a lot of repetitive tasks and have a terrible memory – I also have adequate space.
- You need to plan – if you see my template below the following image you can see I mapped out keys with commands I use regularly – I also chose icons for some tasks – I also coloured the labels. I also made sure I had created combined key shortcuts for all my tasks so there was no confusion and crossover – this can all be done in ‘Actions’
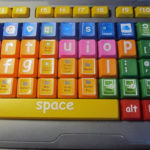
- Size of keyboard – You can find oversized keyboards on Amazon and such sites that have been designed primarily for young children – these have keys and in some cases coloured keys – these can make even better shortcut tools.
