Reaper’s own built in guitar fx and modelling?
Yes, in the JS plugins folder there is a plugin in Reaper called Convolution CAB/Amp Modeler.
As it is it comes with several amp models already installed but there is no way to load other impulse responses. Or are there?
Well yes there is.
In the Reaper resource folder you will find Convolution CAB/Amp Modeler’s impulse folder. We can save/copy our impulses here.
What is an impulse file?
First you will need some guitar impulse files. These will need to be 44,100 as this seems to be the safest to use.
There are lots of free impulse files on the internet. Some links here.
We’ll first look at Reaper’s Convolution CAB/Amp Modeler JS plugin.
If you want to skip to other sections you can follow the links below.
Resource Path
Add Impulse Files to Convolution CAB/Amp Modeler Folder
Edit JS Plugin to add custom folder for Cab/Amp Modeler
Let’s go simple:
A simple run down of the Convolution CAB/Amp Modeler JS plugin.
Add a track in Reaper and open FX insert
Look for the JS Folder:
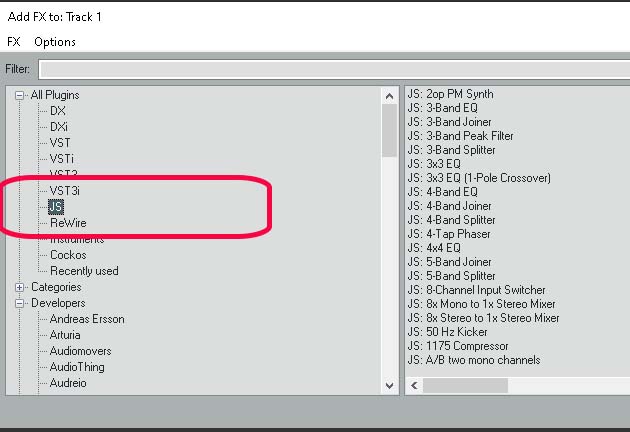
Reaper’s Add FX to Track, searching JS folder for Convolution Amp Modeler plugin for guitar
In the Filter Seach Box:
Type cab – it should filter down your options and bring up JS: Convolution Amp/Cab Modeler.

Reaper’s FX browser showing JS Plugin Convolution/Cab Modeler. Search filter.
Once inserted you will be presented with the following plugin.
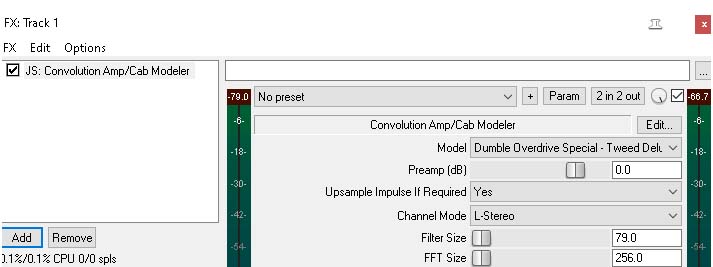
Using the JS Plugin Convolution/Cab Modeler, window showing settings for FX on a track.
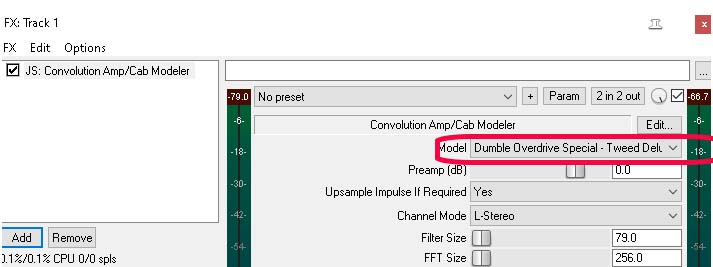
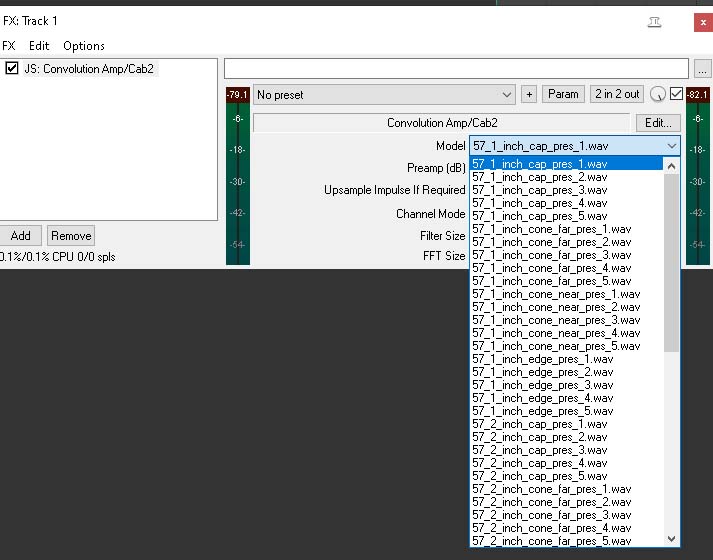
Reaper FX window sowing JS Plugin Convolution/Cab Modeler. Model Drop down form to change Speaker.
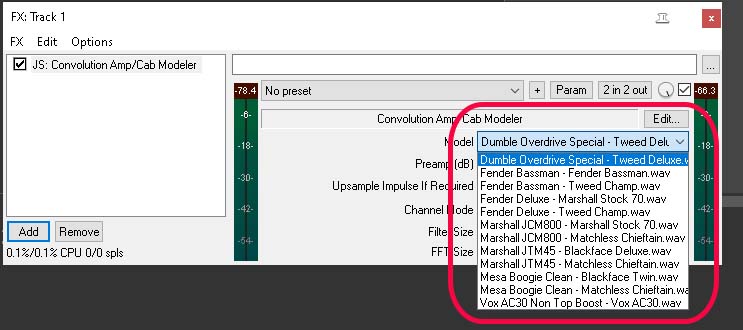
The circled drop down form shows our model options.
Reaper FX window sowing JS Plugin Convolution/Cab Modeler. Model Drop down form to change Speaker.
Before we carry on it’s worth noting that the preamp is set to 0db – this will cause clipping.
Change this setting to -18 – this will give us some headroom to play with.
If you arm your track and engage monitoring you should now here your guitar with the chosen effect.
We can now add another effect to create a distorted/overdriven guitar sound.
We can use the built in JS Distortion Plugin – as add an effect in FX. Go to to JS folder and in the search box type distortion. Add effect and then move that effect to the beginning of the FX chain. See below.
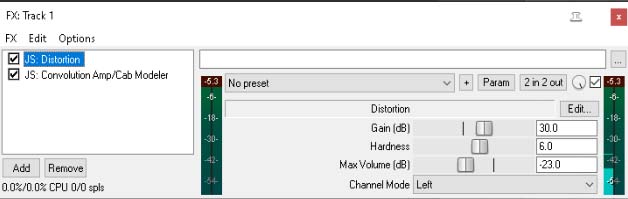
Reaper FX window sowing JS Plugin Convolution/Cab Modeler. Model Drop down form to change Speaker and JS Distortion plugin.
As you can see above I have adjusted a few settings – mainly the Max Volume as this can overload the channel if not adjusted.
Clean: Dumble Overdrive Special
Distorted: Dumble Overdrive Special
Another option is to use an 3rd party VST effect.
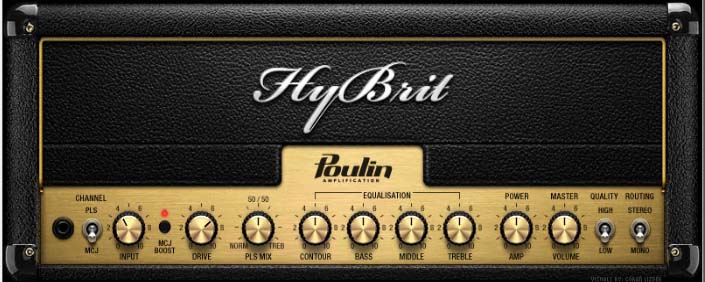
The Poulin HybBrit Vst guitar amp is perfect for this.
I have adjust the settings for this effect – MCJ is ENGAGED and DRIVE is at around 1 O’clock.
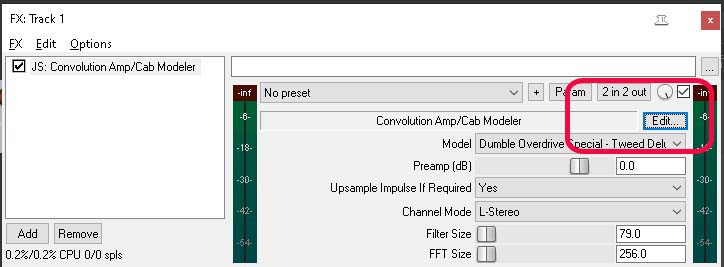
In Convolution Amp/Cab Modeler I have changed Model to Marshall JCM800.
I have adjusted preamp to -18 as well.
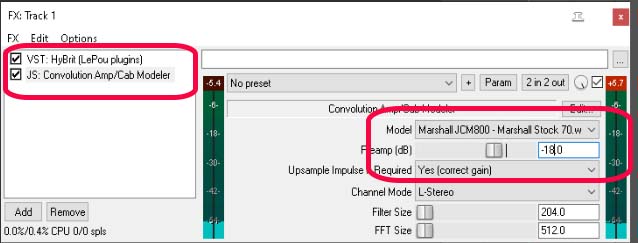
JS Plugin Window with HyBrit guitar preamp by Poulin.
You can go further by adding more effects to the chain such as flanger, phaser delay and reverb but this is as far as this section goes for the moment.
Adding more Speaker Impulse Responses
to Convolution CAB/Amp Modeler
I’m going to assume you have some impulse responses already.
On your menu bar loof for the Options dropdown.
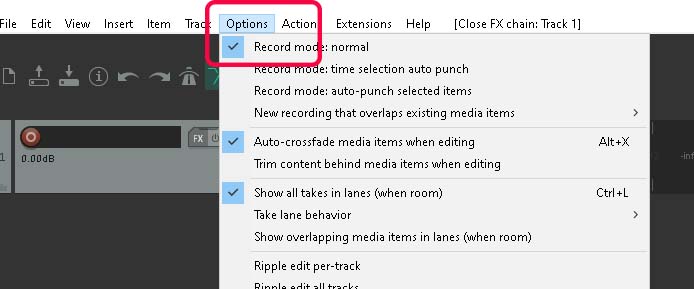
Opening up the Options drop down form to open Resource folder.
From there look towards the bottom of the drop down and you will find Show REAPER resource path…
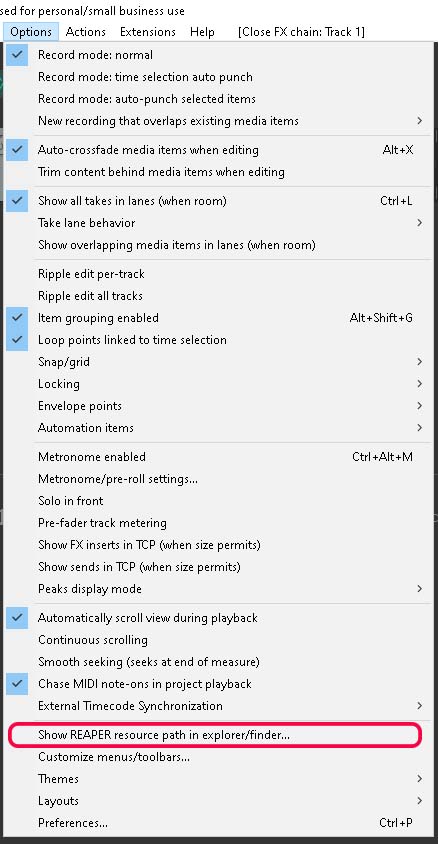
How to locate REAPER’s resource folder. Menu, Option, Show REAPER resource path in explorer/finder.
REAPER resource path…
Look for the folder named Data and open it with double click.
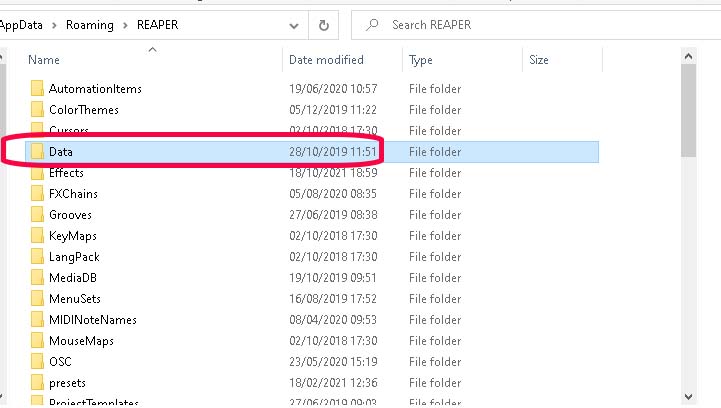
Reaper’s resource folder in Windows explorer.
REAPER resource path…Data Folder
Look for amp_models folder.
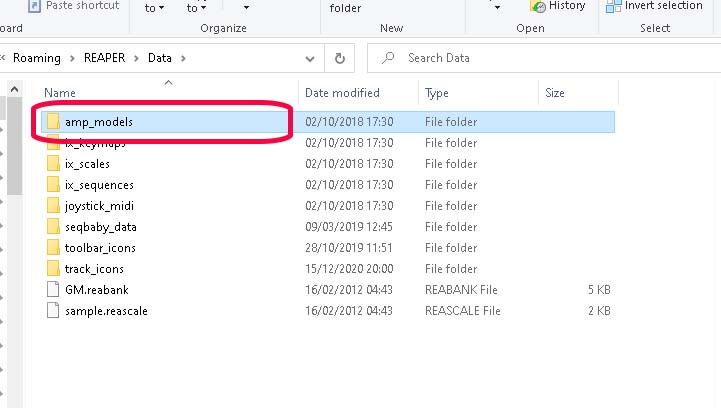
Locate the amp model impulse files for Reaper’s JS Convolution Amp/Cab Modeler
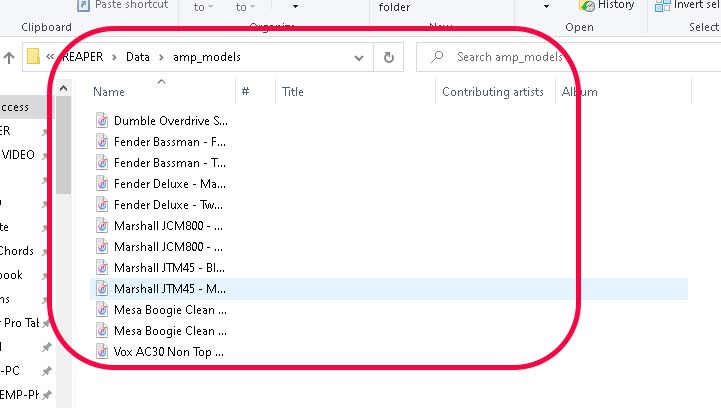
REAPER resource path…Data Folder/amp_models
As you can see. This is where the impulses for Convolution CAB/Amp Modeler live.
You install our own impulses all you have to do is download and then copy and paste to this folder – reload your Convolution CAB/Amp Modeler plugin and they should now be seen in the drop down.
It’s a really good idea to browse to this folder and then open another explorer window to find your impulse files. That way you can copy from one to the other and save time.
amp_models folder for JS plugin impulse files
This is pretty much it, oh hang on there is more. What if I want to only see my impulses? What if I want to have my own settings?
Yes to both. We can create our own copy of Convolution CAB/Amp Modeler and edit it to work however we want.
Edit JS Plugin to create new custom version:
Insert a new track Open FX Chain on your Track and look for JS:Convolution CAB/Amp Modeler.
Right click on plugin as shown below and choose Edit JSFX.
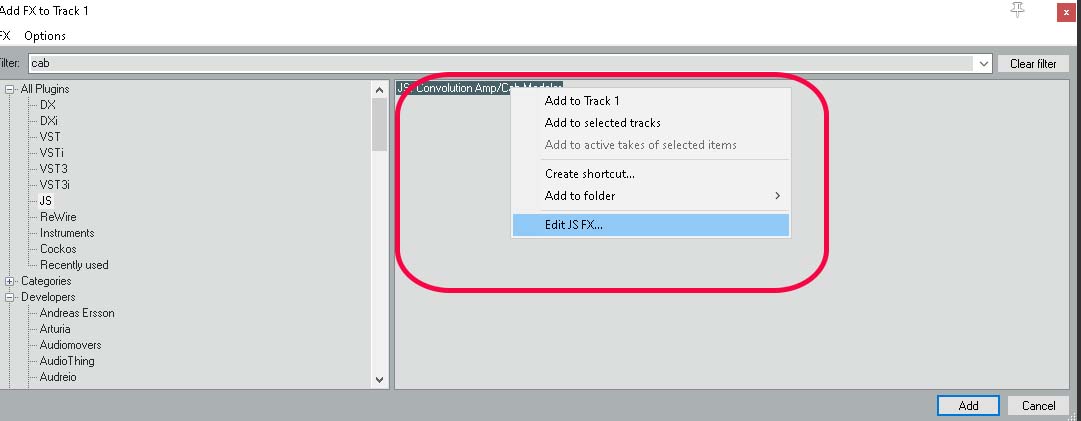
How to create a custom version of a JS plugin in Reaper
This will open up the JS Effect in notepad.
From here we can make a copy of the plugin to create own our custom version.
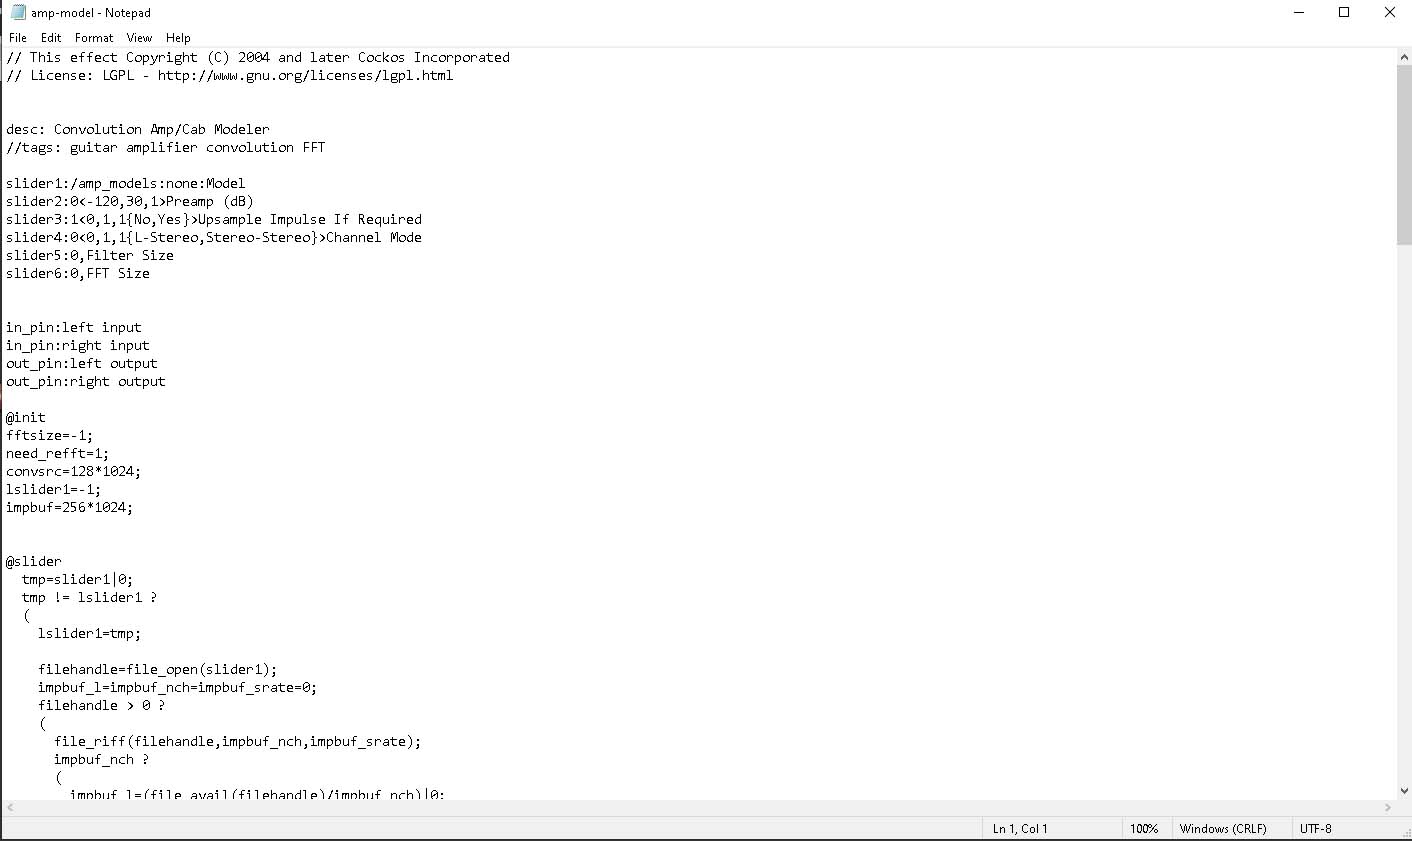
Edit JS Plugin to create new custom version
Select All and copy:
Ctrl A to ‘select all’ and Ctrl C to ‘copy’.
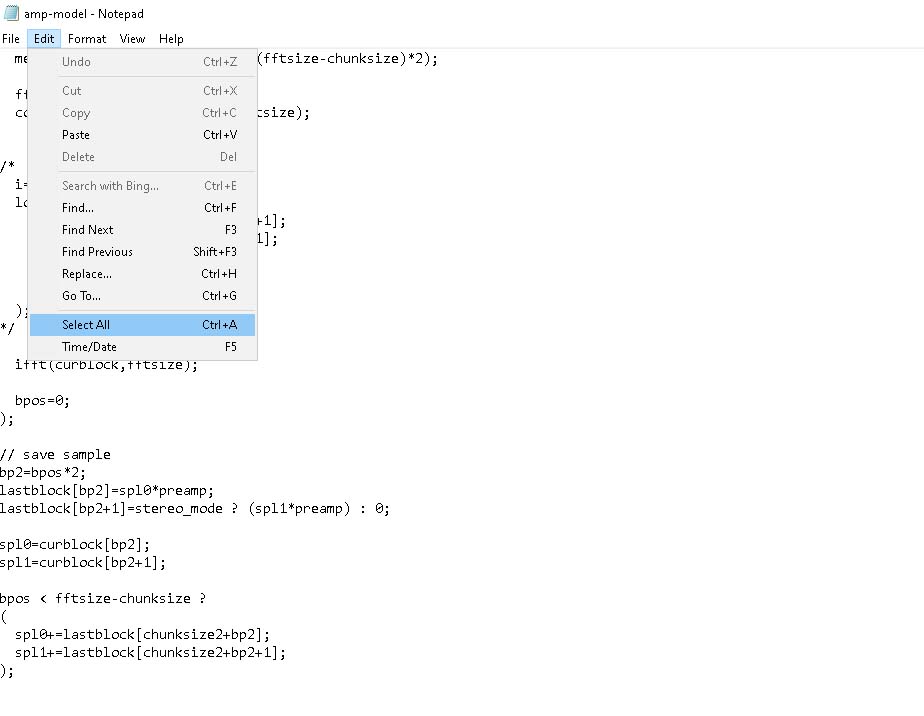
Edit JS Plugin to create new custom version. Copy code from JS Plugin opened with Notepad.
Create new JSFX…
To create a new JS plugin we need to right click on a particular area of the FX pop up screen.
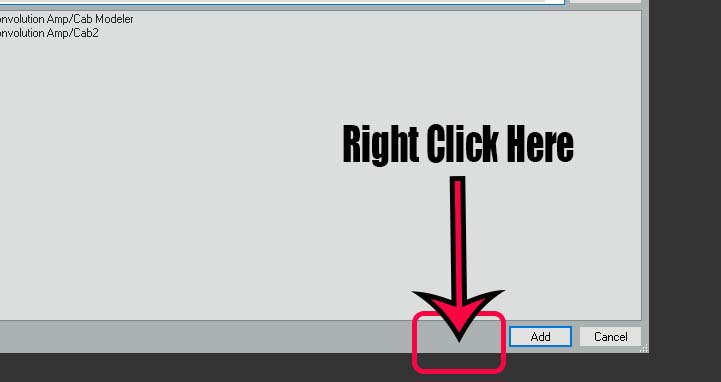
Edit JS Plugin to create new custom version. Right click on window.
Pop up options:
Create new JS FX…

Create new JSFX Plugin form Reaper’s FX browser window.
Give your new plugin effect a name.
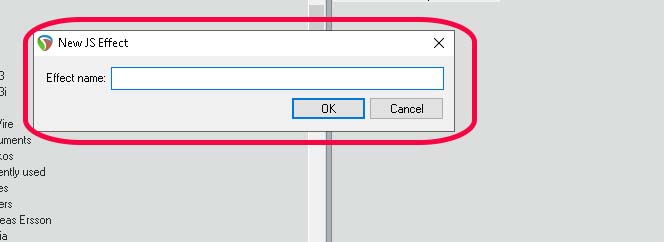
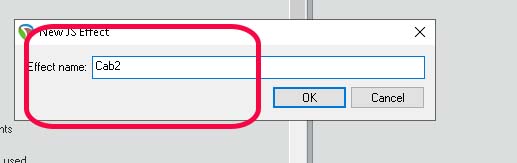
Effect Name JS Plugin creation in Reaper.
I will name mine Cab2 but you can name it whatever you like. Maybe something in common with you impulse files.
Editing JS Plugin: Copy and Paste
First you need to select all the code automatically created by Reaper as shown below.
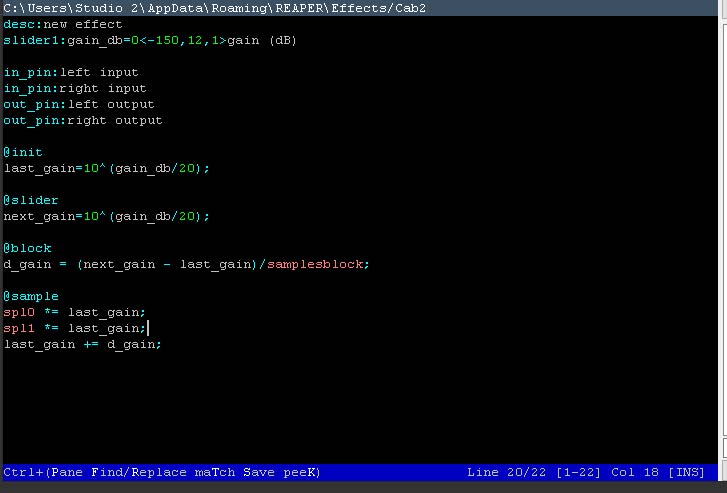
Editng Reaper JS plugin withing FX Browser.
Ctrl A to select all.
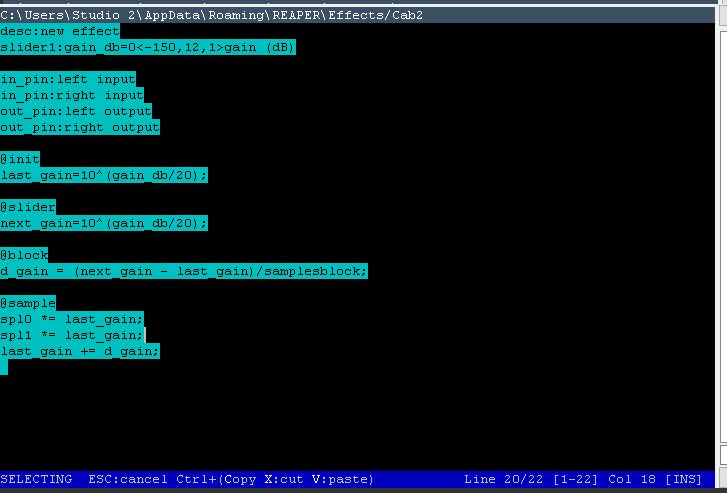
Editng Reaper JS plugin withing FX Browser. Copy and Paste code.
You can now copy the cope from the opened Notepad file you opened earlier and copy and paste into the above screen.
You should now see the added code as shown below.
Editing Reaper JS plugin code inside FX Browser.
This code is now ready to be edited to fully realize our custom JS plugin.
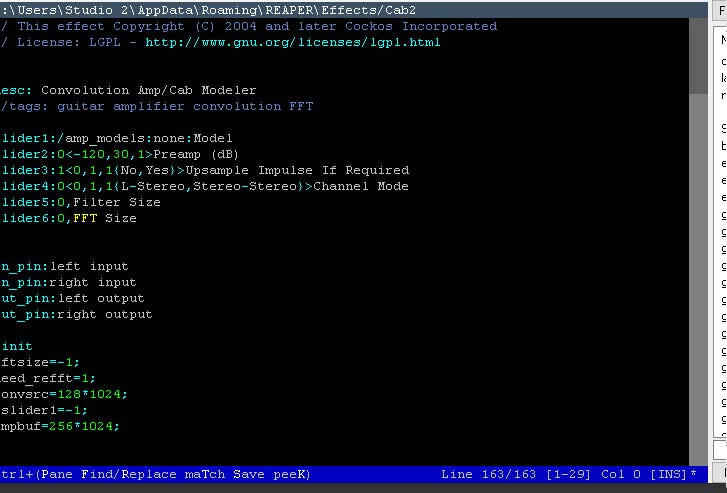
First let’s rename our plugin. Look for the code as circled below.
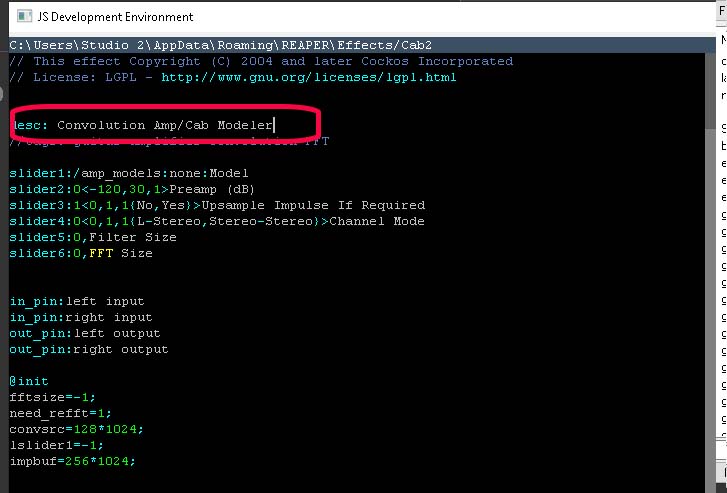
Editing JS plugin code inside Reaper’s FX Browser.
As you can see from the example below I have renamed my plugin Convolution Amp/Cab 2.
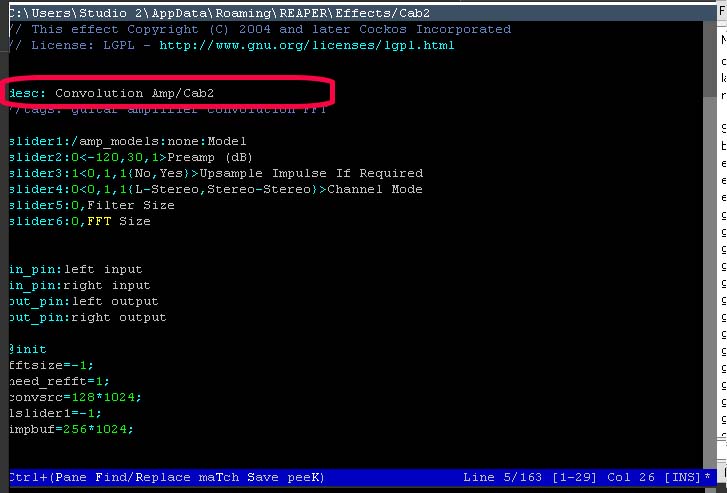
Edit/Creation Reaper JS plugin code inside FX Browser.
Pointing plugin to impulse folder:
Before we edit we need to make sure we have our impulse files somewhere easy to find.
Open Reaper Resource folder.
Navigate to Data folder
You should copy your impulse folder into the Data folder, below I have copied my impulses into a folder named Cab2.
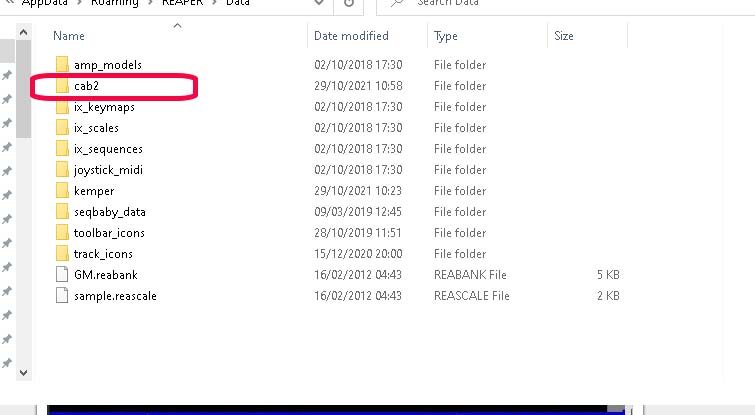
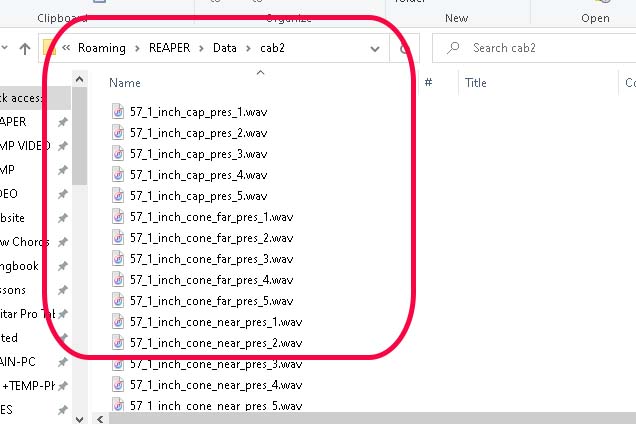
Impulse Files Installed in Data Folder
Now we have our new impulse files saved in the Data folder we can now point out custom plugin to see them.
Edit the line circled below where I have /cab2 – name or rename to show your folder.
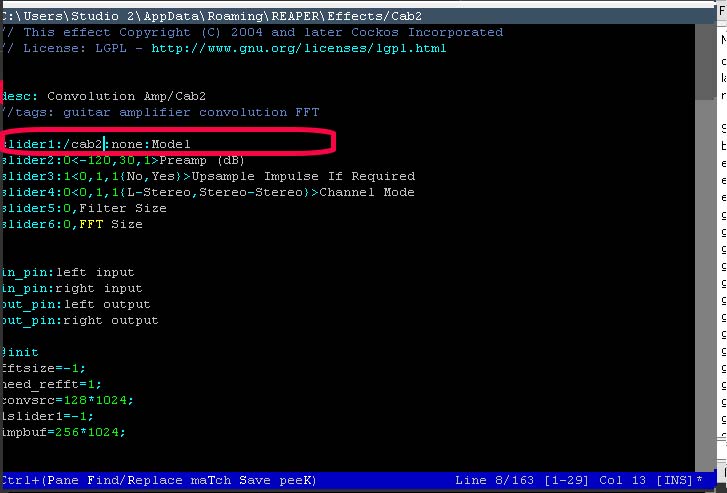
At this point you can save your plugin using Ctrl S and it will be ready to load.
Open FX Chain and scan for new plugins.
Right Click in the panel to the left.
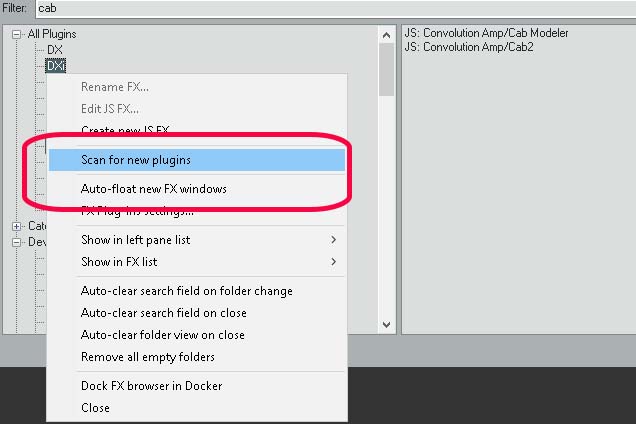
Reaper Convolution CAB/Amp Modeler: Custom Plugin
Hopefully in the folder that appears called New your new custom JS plugin should be available.
You can now load up that plugin on your track.
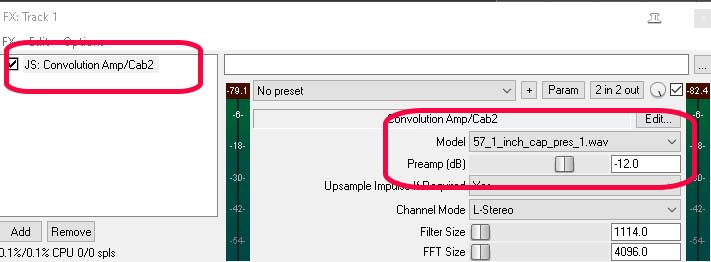
It should look something like the image below. When you open the Model dropdown your impulse files should be visible.
You could leave it there but why not fix a few things while you’re here?
Click edit button.
Adjust Preamp Volume:
The preamp setting can be changed and saved so that we don’t hit the red and can add gain effects to our change – some files may boost that hard that we end up clipping the channel. To rectify this we can edit our custom plugin as below.
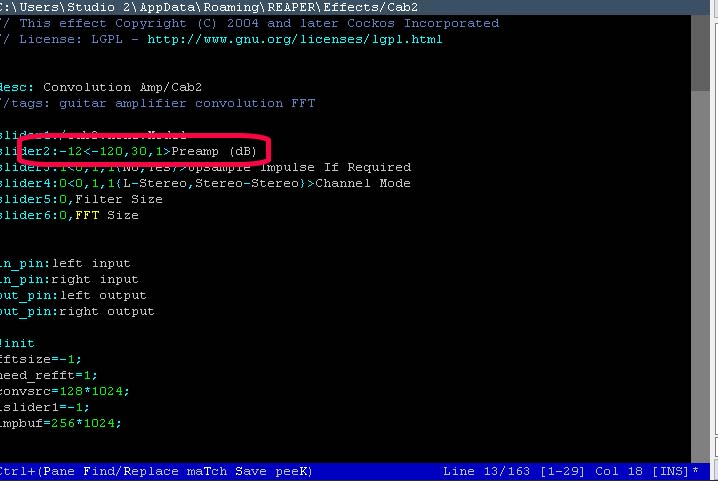
We are going to edit the circled line.
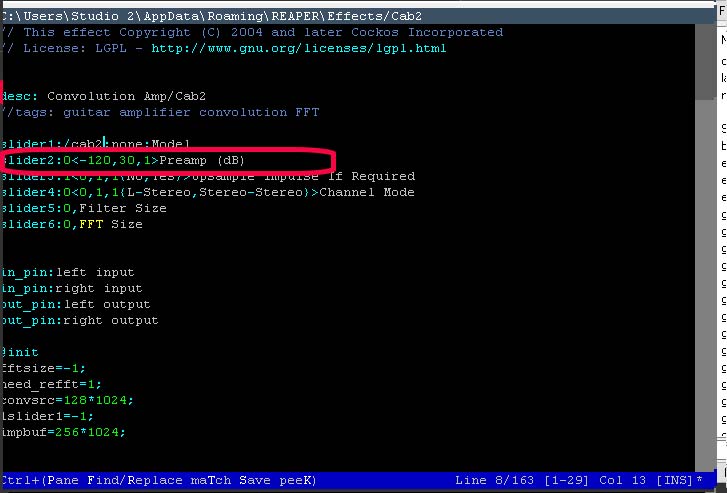
At the line starting slider2: we want to change the 0 to -12 or whatever you feel appropriate. Ctrl S to save and reload the plugin and your new plugin will have -12db as standard.
Your saved plugin file can be found in the Effects folder of your Reaper Resource folder.