The following is a tutorial on mapping the Korg NanoKontrol to Sonar…
If you’re looking to setup the NanoKONTROL for Reaper then click here
To start check your installation of the driver is correct –
Install Korg NanoKONTROL usb Driver
—–>>>
Setting up the NanoKontrol is quite simple really – for this tutorial I’ll be using Sonar 7 Producer Edition.
(make sure you’re nano is plugged in and setup correctly – last chance or this won’t work)
Fire up Sonar,
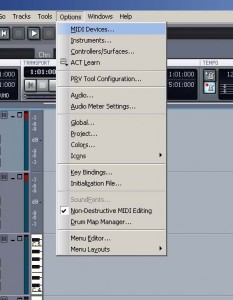
Now look along the top and find ‘Options’ choose – MIDI Devices
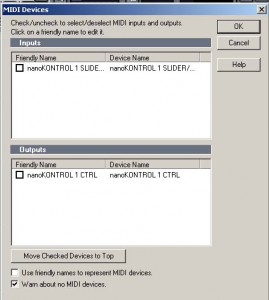
Put a tick next to nanoKONTROL 1 SLIDER/
![]()
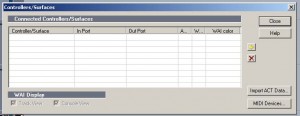
Click controller surfaces,
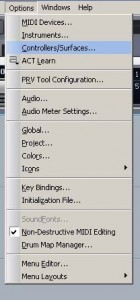
This box will appear
Click this icon
![]()
to add new controller.
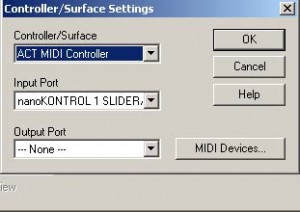
Choose ‘Cakewalk Generic Surface’
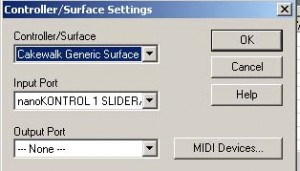
Make sure Input says ‘NanoKONTROL’ – if nothing is there then something went wrong – if another device is listed check for Nano in dropdown…
Click Ok.
And close box.
——->>>
Now you need to look for the following,
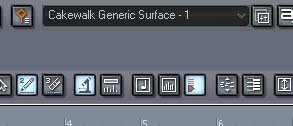
Once you’ve found it click the button next to the ‘a’,

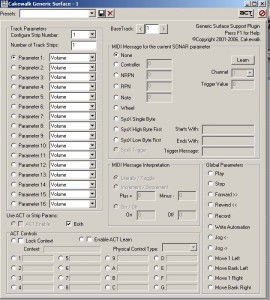
This will open the following screen,
In presets enter a name, I’ve entered, ‘NanoKONTROL’
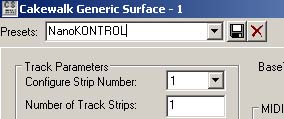
Save it by clicking the disc icon.
Remember to do this after every action from here on in.
We don’t want any accidents.
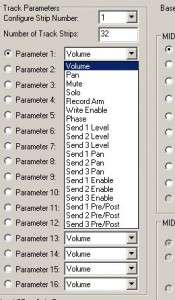
Change ‘Number of Track Strips‘ from 1 to 32 – maximum available.
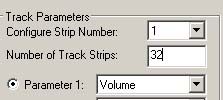
Remember to do this after every action from here on in.
See the ‘Configure Strip Number’ – that is our first track to be assigned after we’ve set up our first one you’ll change that number to carry on setting up all 32 channels.
Be aware you’ll be using the ‘Scene’ button on your Korg once you get to number ’10’.
Get a peice of paper and make notes of what you’re doing if needed.
So ok here we go.
Parameter 1 – from drop down choose volume(it’s already selected I know but bear with me).
Now click and hold the’learn’ button,
![]()
While holding move the 1st – ‘Fader’ on the Korg
Release the ‘learn’ button and test – you should see activity on Track 1 of Sonar.
Make sure the Volume moves – it is does we’re good to go – if something else moves check your settings and try again.
If there is no movement make sure the Korg is setup properly and seen by Sonar.
Next?
Go to parameter 2
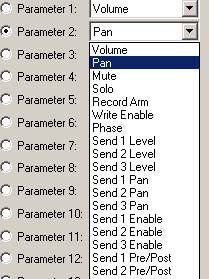
Choose ‘Pan’ – click and hold learn button.
![]()
click and hold learn button and move the ‘rotary’ on the Korg – make sure it’s on channel 1!
Release ‘learn’ button and test – track 1 on should show panning movement.
Well done, if everything worked you now have Volume and Panning working.
You could now assign the buttons. Use the parameters, so;
‘Parameter 3’ could be Mute
‘Parameter 3’ could be Solo.
It’s up to you – just follow the instructions as above.
COUPLE OF THINGS!!! —>>>sorry for shouting but needed to grab your attention.
Remember to change strip number to new channel as you go!!!
And don’t forget to save as you go.
——>>>>
Setting up the transport buttons is very similar.
You need to start from the beginning though.
Follow instructions through to this stage, and choose ACT controller instead,

Click on Ok and close – now we’re ready to setup.
Now click on

Choose ‘ACT Controller’
And open properties as before – this will bring up another screen.
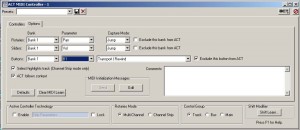
Click ‘Options’ tab
You now have a choice.
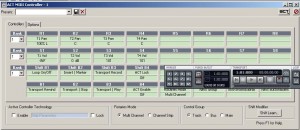
Flick back and take a look at the bottom line – boxes B1, B2,B3,B4
B1 is set up as ‘Transport Rewind’.
B2 is set up as ‘Transport Stop’.
B3 is setup as ‘Transport Play’.
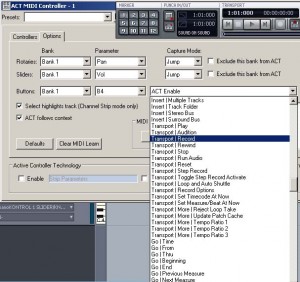
Lets setup B4 setup as ‘Transport Record’
Click ‘Options’ tab again.
Under Buttons – change to B4 and then open ‘ACT Enable’ – and scroll down until you find ‘Transport Record’.
Now click on ‘Controllers’ tab.
Click on box under ‘B4’ – it should see this,
![]()
Press ‘Record’ button on korg – done.
Follow instructions for other buttons and you should be set up.
Don’t forget to save the preset. I usually call it something like ‘KorgTransport’.
—–>>>
Well done, hopefully now you are setup and get playing.
