Make Videos With Reaper
Like it says in the title, and it can’t be stated enough. Make videos in Reaper. Yes. And it is super easy, intuitive and less laborious than premiere.
I’m no video editing expert, I think that is very clear if you watch any of my videos. I just don’t have the chops. Maybe Premiere Pro is just too advanced for me? I have tried other editors but I have to say Reaper wins. Hands down!
There are a few things you have to take in to account though.
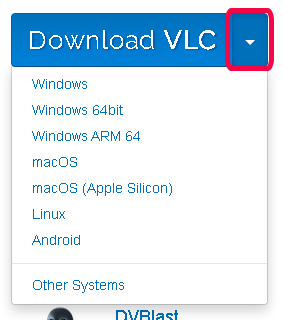
First you need to install VLC Media Player and it has to be the same format as your Reaper 32bit or 64 bit.
Click the dropdown to choose your version. 32 or 64bit.
You’ll need to restart Reaper after installing VLC
Video Settings Reaper
In order to make videos with reaper we need to set up a few options.
Import your video onto a track in Reaper as you would any other media ie wav or mp3.
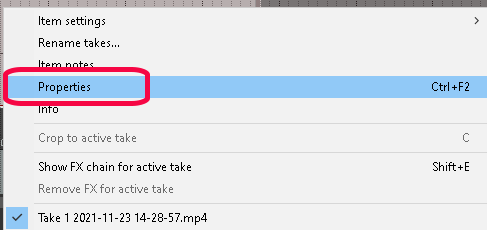
Right click on that track item/file to open properties.
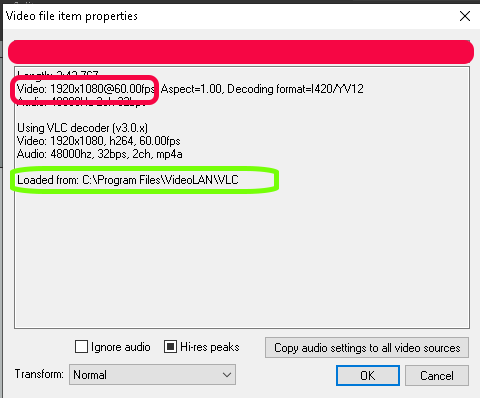
Note the details of the file.
Video: 1920×1080@60fps
Apsect: 1920×1080
Frames per Second: 60
Your details may be different. Note them down because we need to set project settings to reflect them.
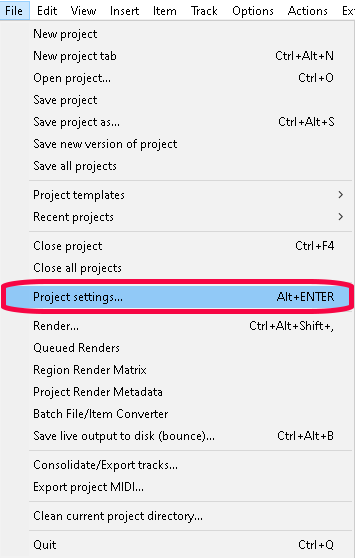
Go to project settings:
File -> Project settings…
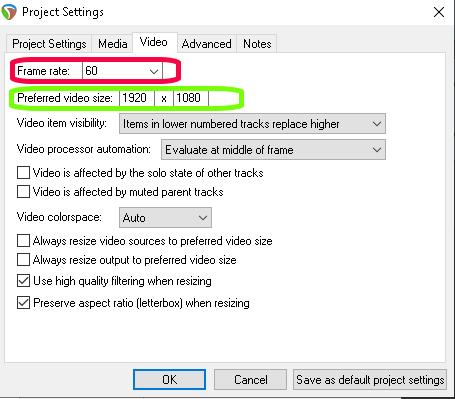
Reaper Project Settings:
Change tab to Video and alter the settings below to reflect the information you made a note of earlier.
Render to MP4 in Reaper
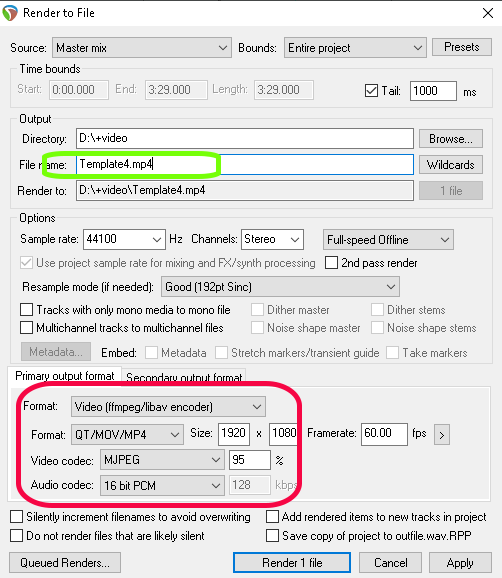
To render video in Reaper you need to change the option highlighted in red to, ‘Video (ffmpeg/libdav encoder)’.
To save as an MP4 file you need to specify the file format as highlighted in green below.
If you don’t give your file the extension MP4 it will default to MOV and you will have to use a program such as Handbrake to convert your rendered file.
Below are some more extensive videos on how to create video in Reaper.
They deal with settings, rendering, editing and creating effects and overlays.
Each video is well worth a watch.
