Start up Reaper and press Ctrl + P on your keyboard. (cmd + , on MAC)
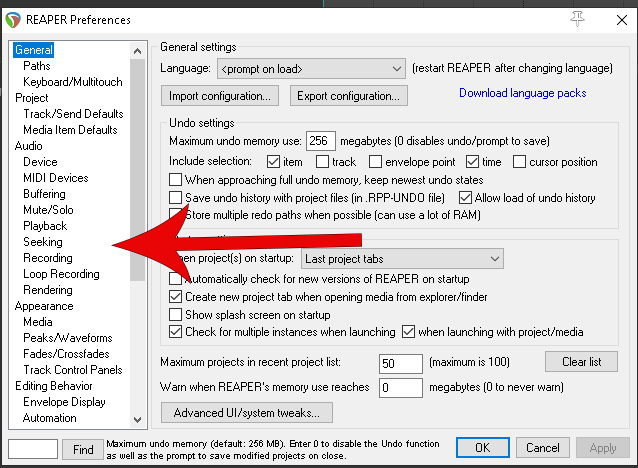
This will bring up your prefences page.
In the pane to to the left you’ll see some menu choices:
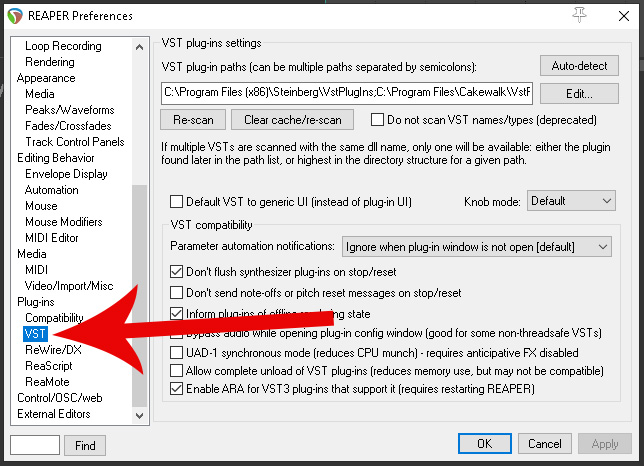
Scroll Down until you see the VST menu and click on it:
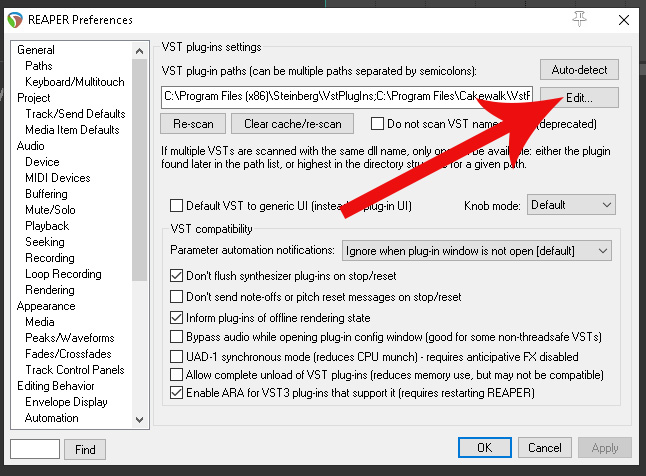
To the right hand side you will see an ‘Edit’ button
If you click the edit button it will show you which folders you have set up for your VST’s
You can choose one of these yo install to or add your own by clicking add.
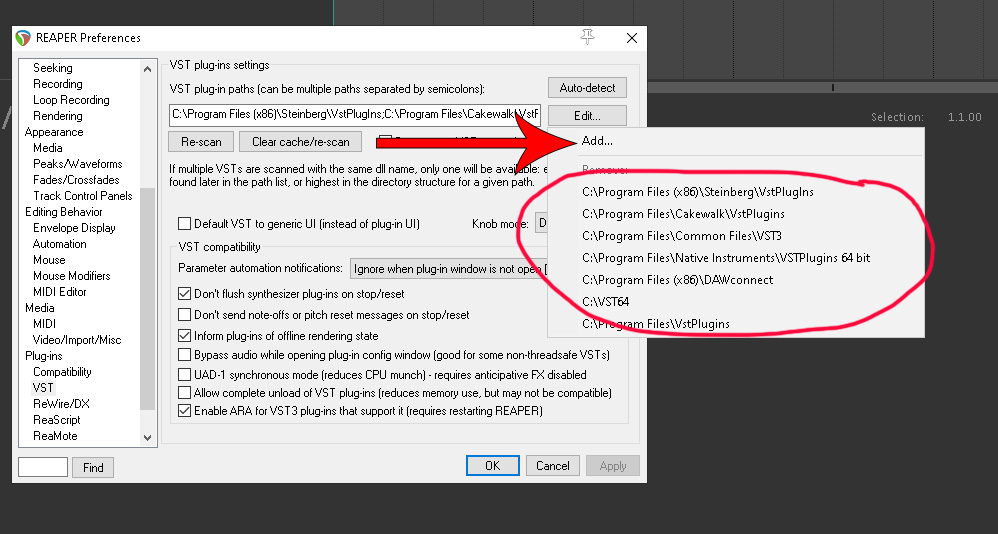
If you want to add and create your own then follow the instructions below:
Click the ‘Edit’ button followed by ‘Add’
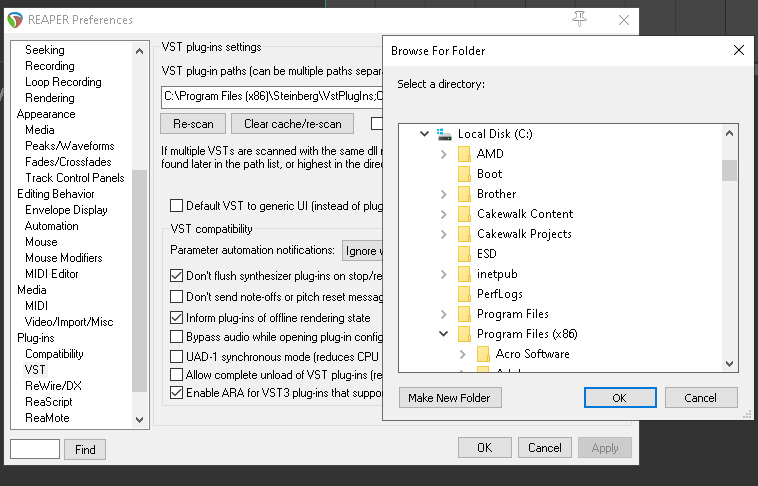
Now you decide where you want to install your VST folder –
If you have more that one hard drive you can install on your 2nd hard drive – the procedure is the same – for this example we are going to use the C: drive
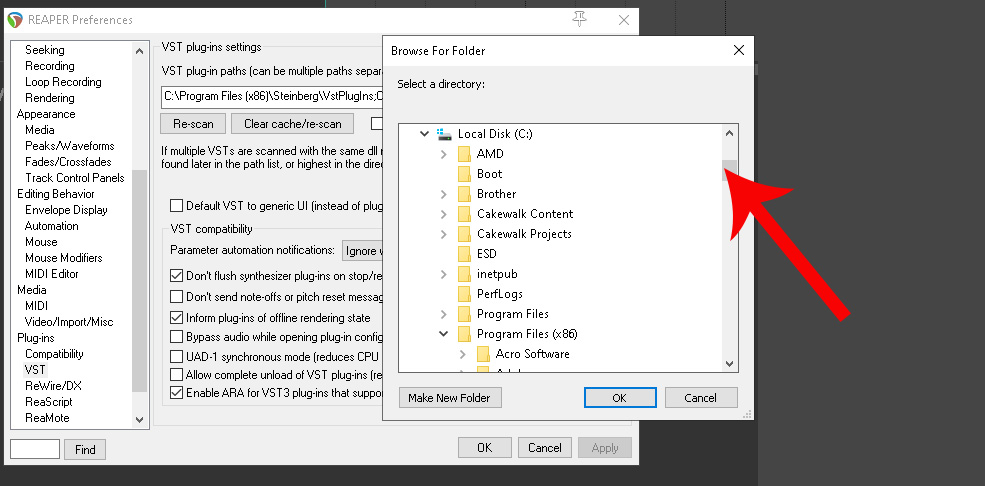
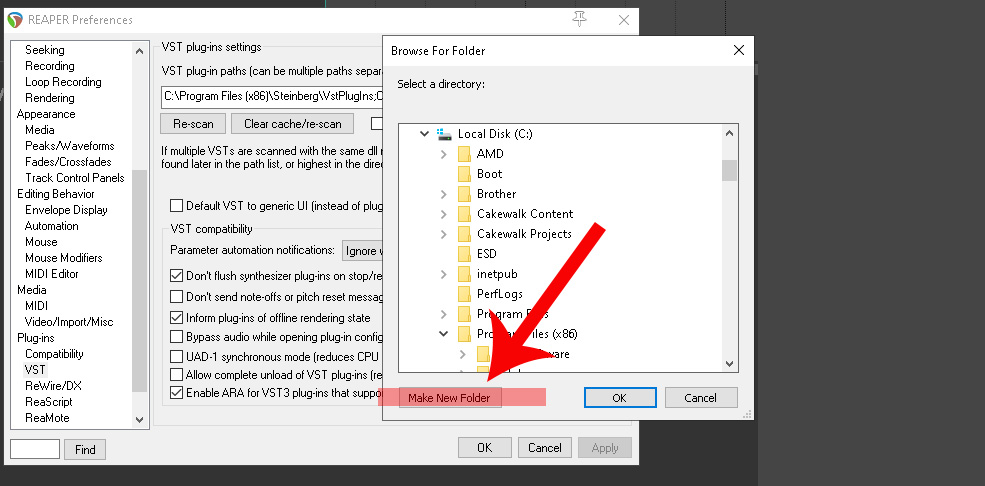
You can use the scroll bar to more the view until you find your hard drive, in the image below you can see the C: drive highlighted:
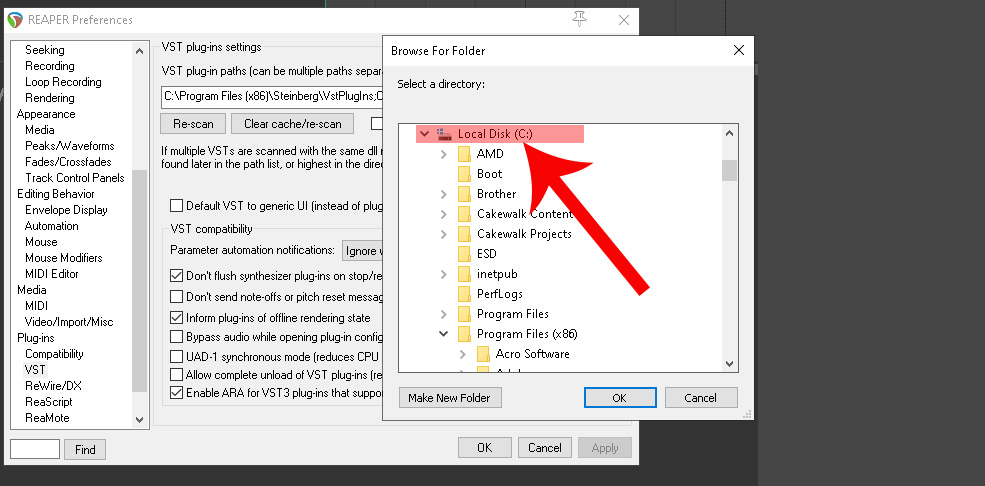
To create a new folder click the button ‘Make New Folder’ – I go with VST64 or VST32 dependent on operating system and VST types – {note you can’t use 64 on 32 but you can via a built in ‘bridge’ in reaper use 32 on 64}
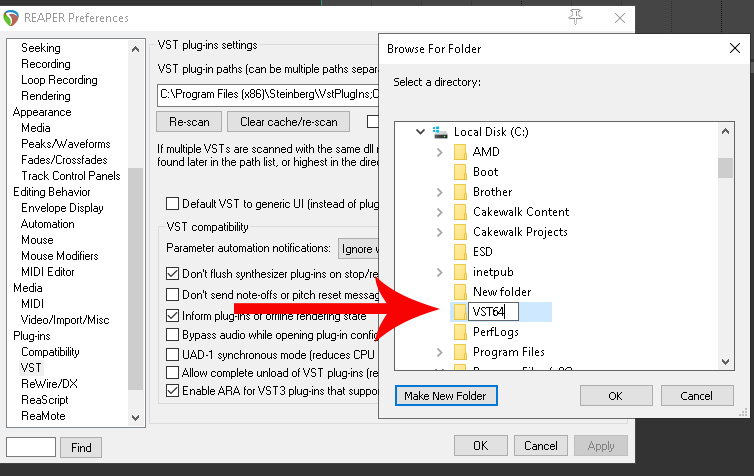
Your address now for that folder will be C:/VST64
Make a not ofe that folder – you will need to enter that whenever you install a VST whenever that is a *.exe installer or extracting a *.dll from a zip file
