Within Sonar there are some very cool little tricks which go unseen at first.
One of these is the ‘Envelope’ feature.
With the Envelope we can control the parameters of a track such as the ‘Volume’ and ‘Pan’.
There are more parameters but we’ll stick with just these two to start with.
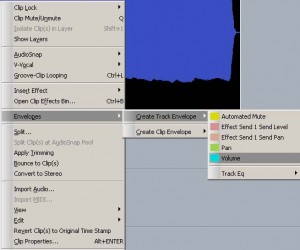
To add an envelope,
Right Click on track,
From the screen shot above,
Envelopes -> Create Track Envelope -> Volume.
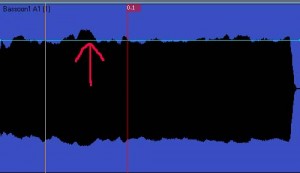
The red arrow points at a vertical light blue line, this is the newly added volume envelope.
To add control we need to add ‘nodes’ – these are like slit points in the line.
:::To Add Node:::
Hover above the blue line and double click on area where you want the ‘node’ to be.
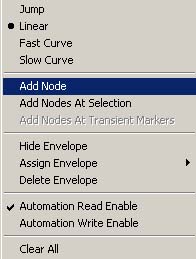
– Or choose a point and right click,
At the top of this box you can see there are 4 choices of node.
Jump, Linear, Fast Curve and Slow Curve.
I’ve chosen Linear. – Try each one to see how they affect the track.
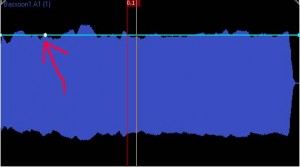
The arrow in the picture above points at the newly created note.
You can add as many nodes as you like.
As I said before these control the envelopes parameters.
Click on the node, it turns white.
Drag the node.
Volume: goes up and down as you would expect.
Pan: goes left (up) and right (down).
EQ is a bit more involved and requires a bit of knowledge about EQ settings and parameters.
You can also create an envelope to control the amount and pan level to you ‘effect send’
:::Automation:::
If you want you can record your volume changes on the fly.
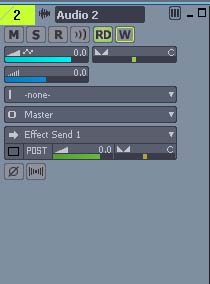
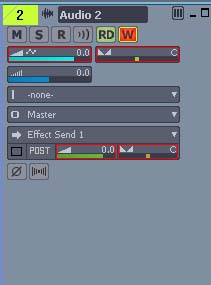
Have a look at the above screen shot – look for the ‘W’ button – the Automation Write button.
Click it and it should turn red as shown in the picture below – Automation Write is now enabled.
Now if you press play and move your volume up and down you’re movements will be recorded.
Note you don’t have to add an envelope to do this. It will add one automatically.
Have a mess with it and see what happens.
Be cool , see ya later.
