ReaSamplOmatic5000 Midi Choke Hi-Hat
How to use Reaper to create drums in ReaSamplOmatic5000 Midi Choke Hi-Hat.
Creating your own instruments in Reaper is quite a simple exercise when you know how.
Using Reaper’s built in sampler, ReasamplOmatic5000 we can build complex instruments.
Today I’m going to run through creating a simple drum kit. This will include a hi-hat choke using Reaper’s built in Midi ChokeJS plugin.
Skip to Choke Section of Tutorial
Rename FX Instances – ReasamlOmatic5000
1st let’s load up ReasampOmatic and get some samples loaded.
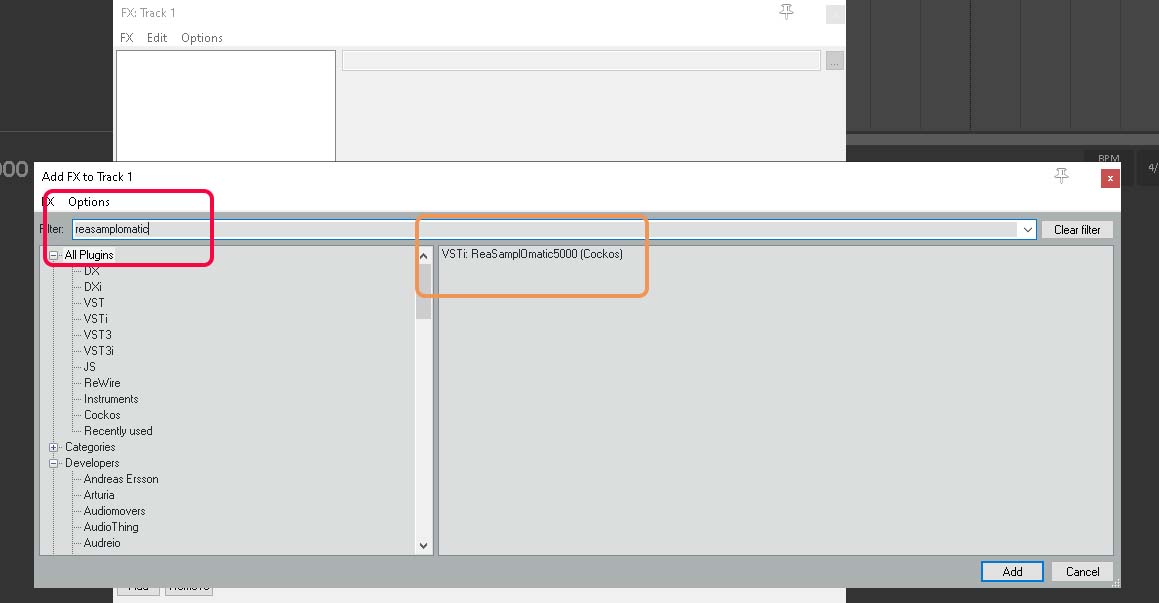
Step 1
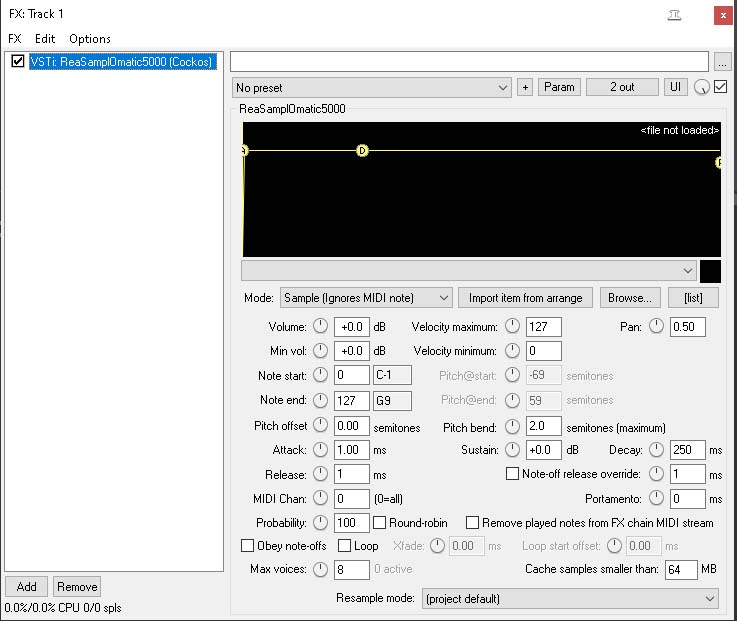
Loading Samples into ReasamplOmatic5000
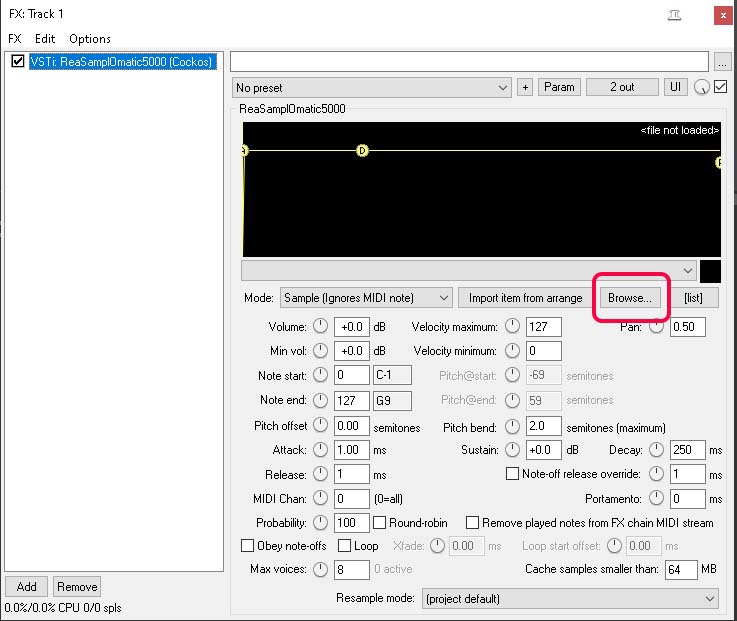
To load our Samples we’ll use the Browse button as highlighted in the example above. Your samples should be saved to a folder/disc that you have easy access to or are in a memorable place on your PC.
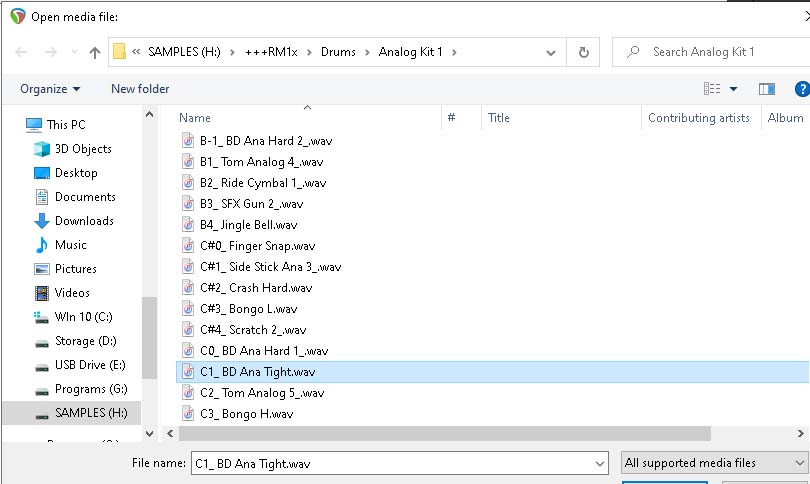
As you can see, I have my Samples saved on a disc called SAMPLES and my folders are named descriptively so that I can find them easily.
Once we have found and appropriate sample: In this case a kick drum that I sampled from the RM1x Groovebox made by Yamaha.
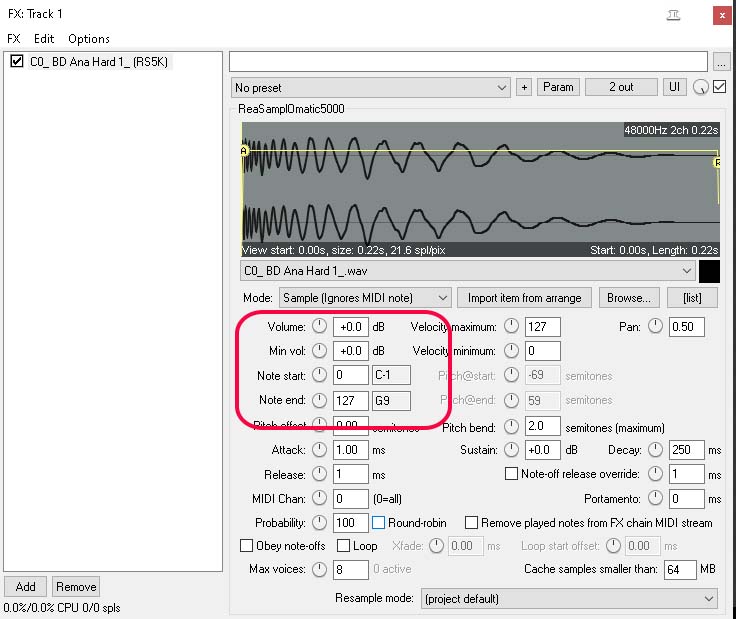
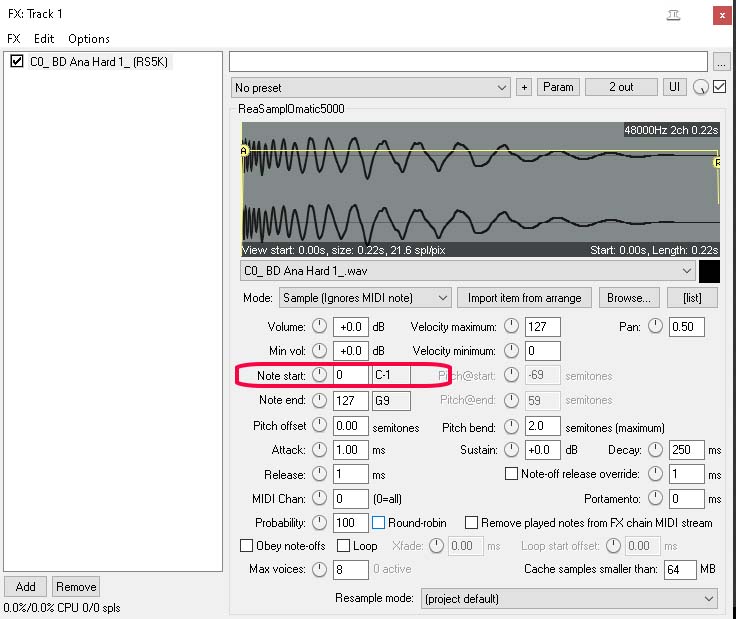
Highlighted above is the note that the Sample needs to be played in order to trigger our Sample – if you note the start note = 0(C-1) In the following image we will see our note end.
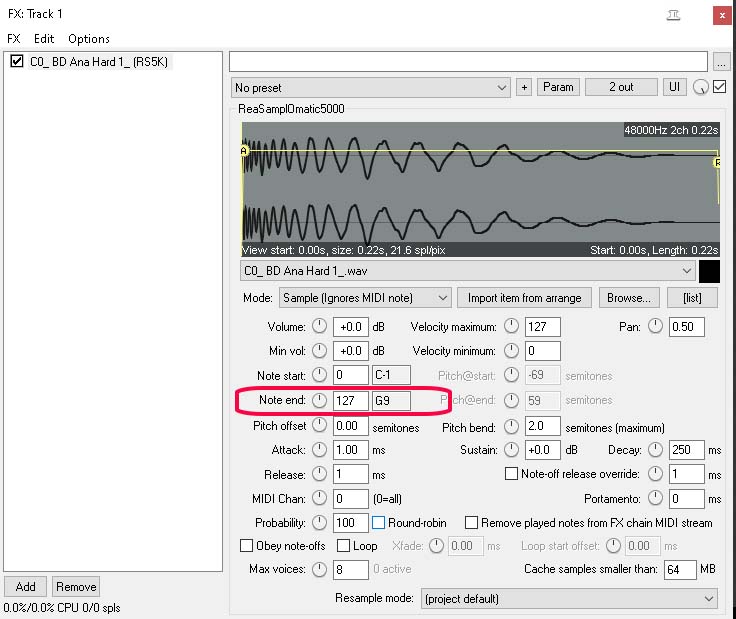
Note End is 127(G9) – with a sampled drum kit we want to have individual notes trigger our samples – as it stands this sample with spread across the keyboard notes from 0-127 or C-1-G9.
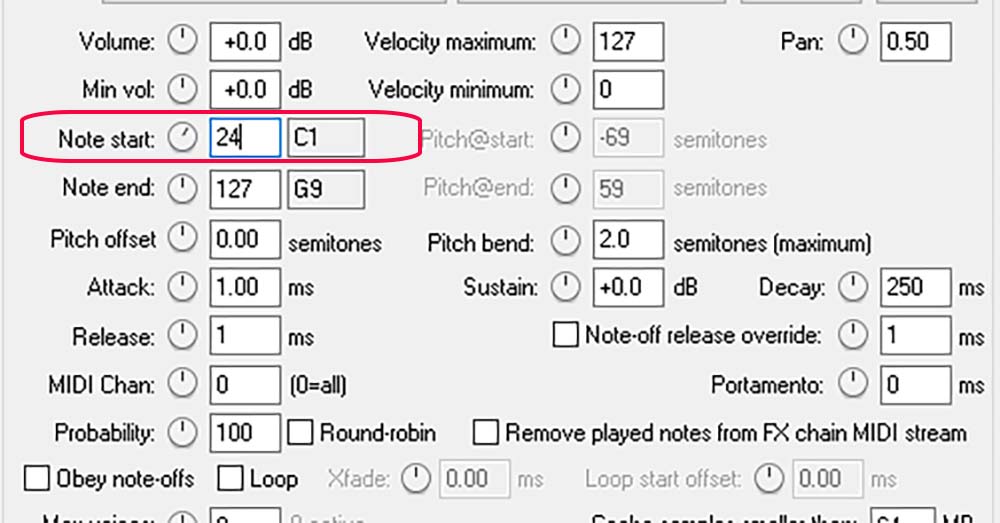
Note:Reaper’s note values differ slightly from other DAWS – If we edit the note start and note end to be the same then only that note will trigger our sample. In this case our Kick drum – we can use any notes but it is common practice to use C as a kick note trigger. As I have quite a lot of samples I’m going to start at C1. The numbers that correlate to keyed notes are as follows: C1=24 C#1=25 D1=26 D#1=27 E1=28 F1=29 F#1=30 G1=31 G#1=32 A1=33 A#1=34 B1=35 To get different octaves add 12 to the value by each note: C1=24 therefore C2=36 and C3=48 etc C#1=25 therfore C#2=37 and C#3=49 and so on
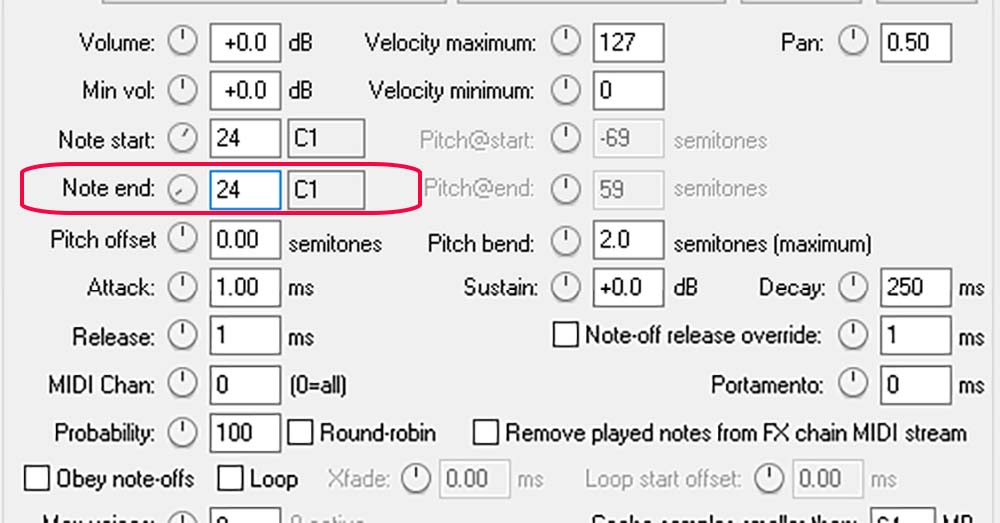
We now make the end note match out start note – in this case Note start and Note end should both bet set at 24, When C1(24) is played the kick drum will be triggered but other keys will not do anything until we assign samples to them.
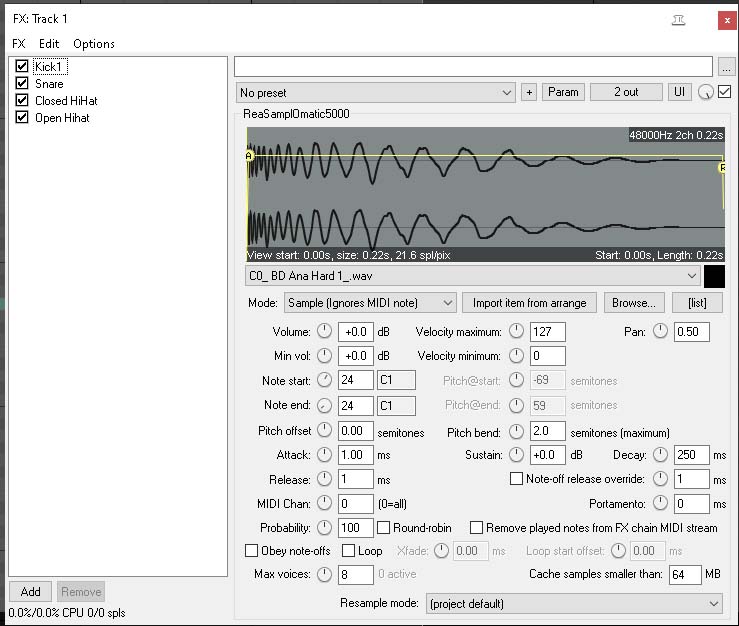
You will have noticed from the image below I have renamed our kick sample to Kick 1
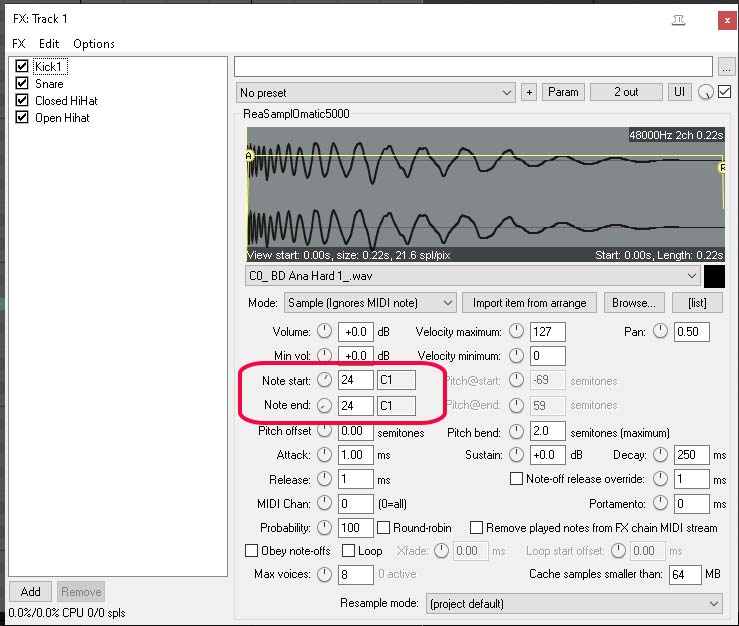
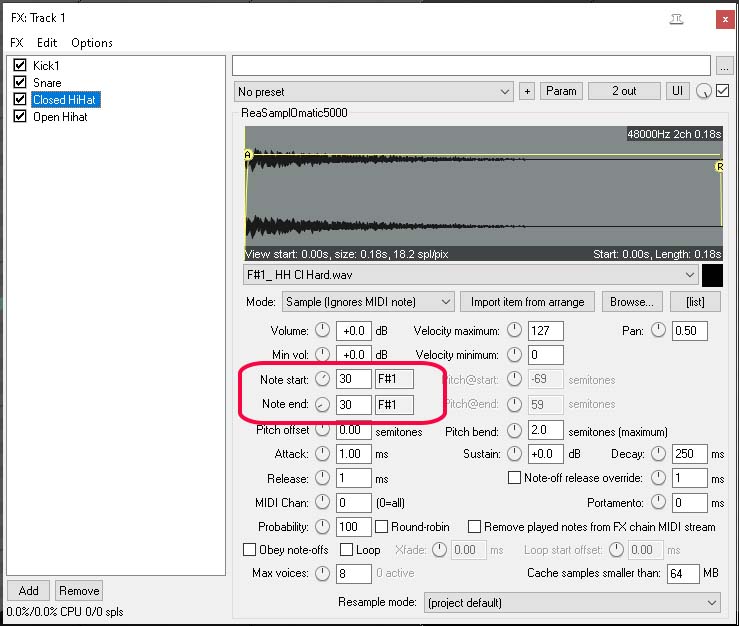
As you can see from the image below I have loaded 4 new samples: To do this follow step 1 and complete each step. when it comes to changing notes make sure you use different notes for each sample as shown in the following 4 images: C1(24) = Kick D1(26)=Snare F#1(30)=Closed Hi Hat and G#1(32)=Open Hi Hat
Adding more samples for more Drum Hits: ReaSamplOmatic5000 Midi Choke Hi-Hat

Step 3: ReaSamplOmatic5000 Midi Choke Hi-Hat
Once we have our samples loaded
When it comes to drum kits we might want do some things that normal drum kits do.
Choke: This is what happens when a HIhat closes – if we don’t set this kit up with a choke then our Open Hi Hat will keep sounding whilst the closed hi hait plays – this is not ideal.
To fix this we are going to use Midi Choke JS in Reaper.
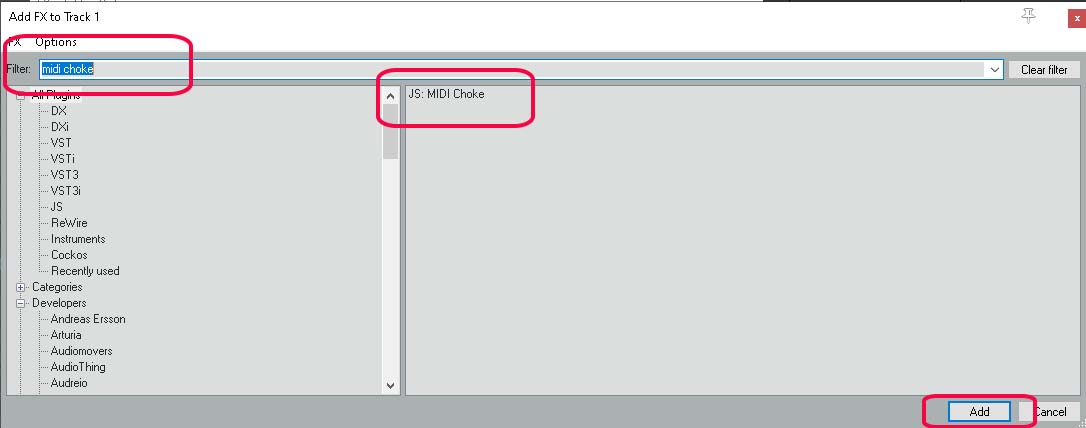
On the same track as out samples open the FX window.
Type Midi Choke in the filter bar and load the effect.
Whenever we use Midi plugins:
When you load a midi plugin on a track that already has a VST instrument you will need to move the Midi effect to the beginning of the chain in order for it to influence the instrument.
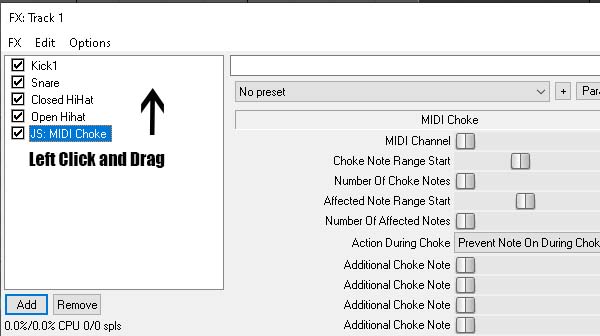
Using Left Click and Drag:
We can reposition the Midi Effect to the beginning.
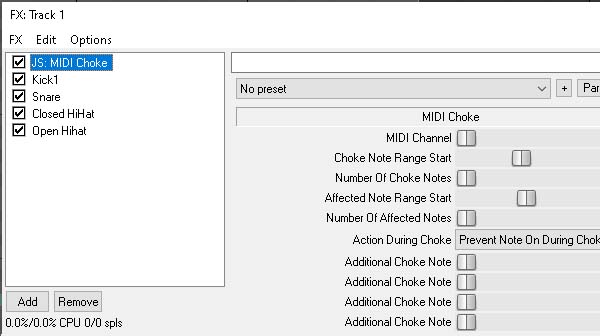
As you can see below we now have JS:Midi Choke at the front of out chain.
Setting Up Midi Choke:
Creating a ReaSamplOmatic5000 Midi Choke Hi-Hat with JS: Midi Choke Plugin.
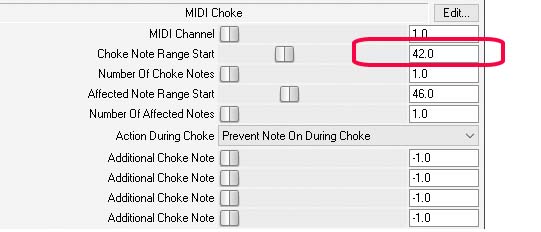
The Note Value in the Choke Note Range Start Box should match the note of our Closed Hi-Hat here it is set at 42 as default – Our sample is set to 30(F#1) – change this value to match your samples note value. This will now be the note that chokes the closed Hi-Hat
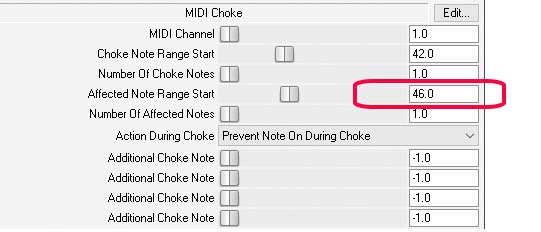
To set our note affected by our Choke Note we need to change the value in Affected Note Range Start to match our Open Hi Hat’s Note Value. In my case this is 32(G#) You should make sure it matches your note value.
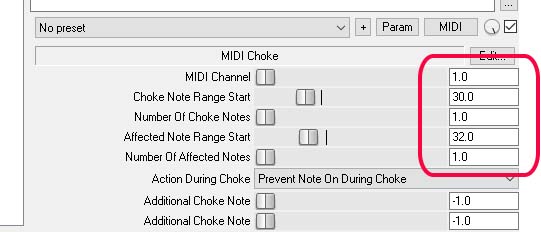
My Hi Hat samples are now set with 30(F#1) as the choke note for value 30(G#1) This means that the Closed Hi-Hat sample with now choke(stop) the Open Hi Hat sample.
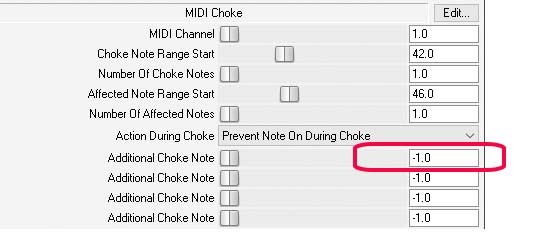
We can also add extra choke notes for any other Hi Hat samples that we have. Make sure you have the correct Note value and enter into the highlighted box.
Rename Samples:
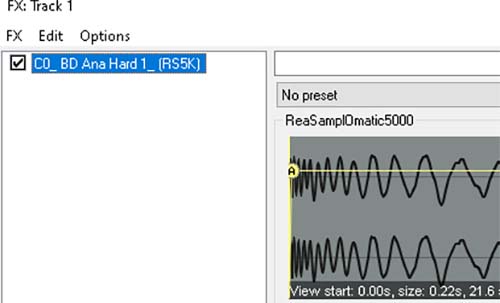
If we want to make things look tidier for ourselves we can rename each SamplOmatic5000 instance to match the type of Sample it is.Iin this case I’m going to rename C0_BD Ana Hard1_ to Kick1
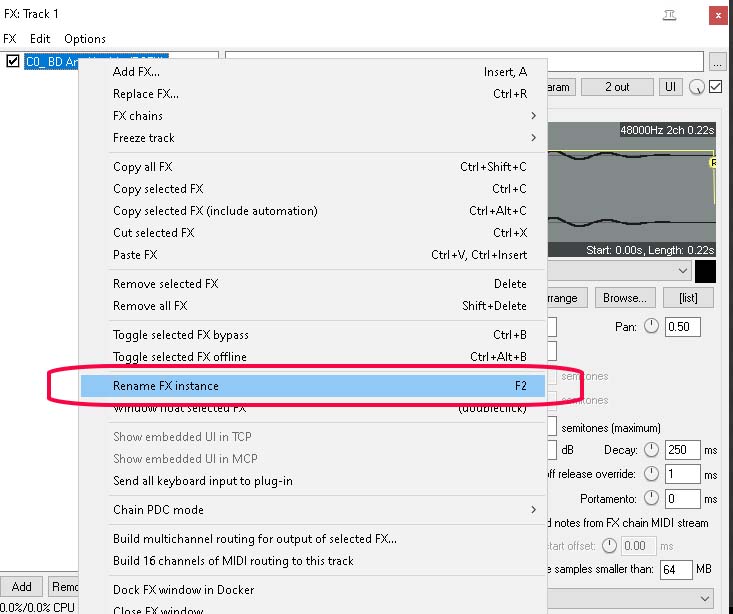
Right Click on your instance or select sample and press F2 to rename.
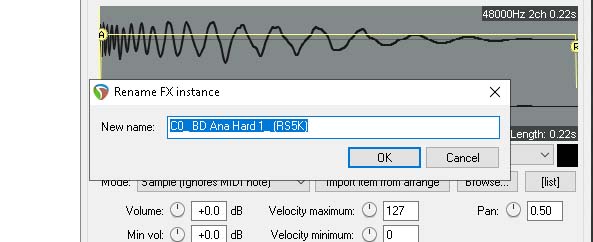
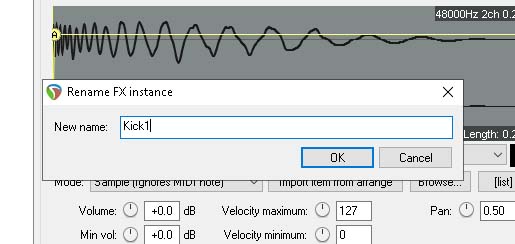
Highlight Old Name – Press Delete or just start typing your chosen name for this sample – in this case I’m going to rename it Kick1
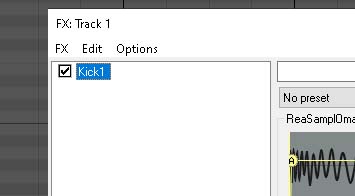
Sample now renamed as Kick1
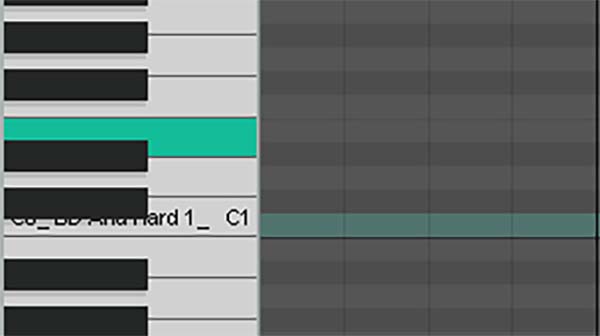
When you open up Piano Roll:
You will see that each Key will have been renamed to the sample that you loaded in.
To change this left click on the key and rename it to suit your needs. This is good practice for when you are writing drum beats.
ReasamplOmatci5000 has another way to import:
You can import directly from your Reaper project.
This maybe be helpful if you wish to save the kit.
- Create Folder with Tracks
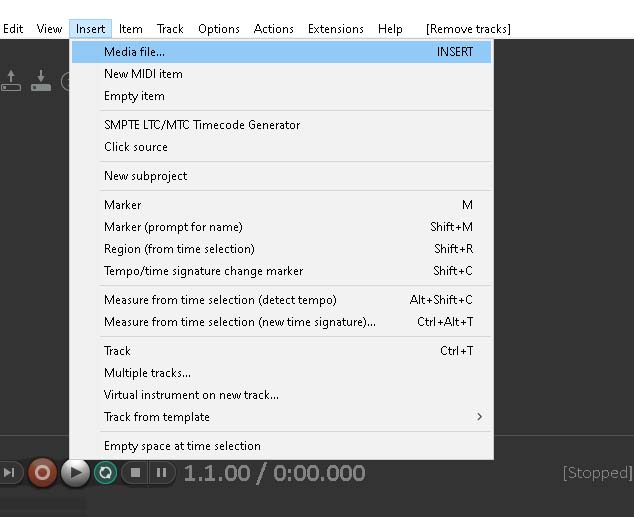
To be able to save our samples we can import them as tracks and then hide them using Track Manager. First Use Insert->Media File to import tracks. You can do this individually or you can select multiple samples at once.
If you elect to import multiple files you will need to choose the option seperate tracks. This will work on a single track but for our purposes choose this option for now.
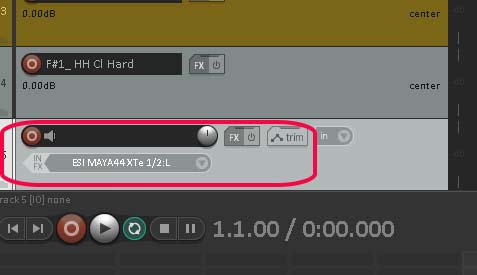
We now nee to insert a track to create a folder – this will help to keep things in our project tidy and it’s good practice to get used to using Folders.
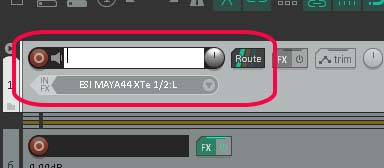
We now need to drag this Track to the top of the tracks so that is the first track – Left Click and Drag the New Track to the top.
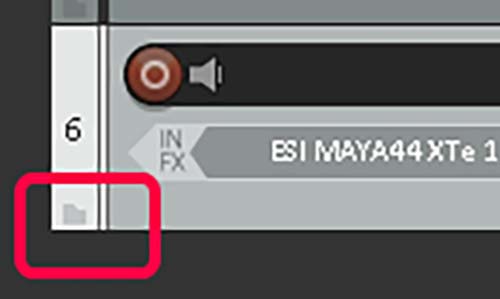
In the image above I have highlighted the folder icon on the Track – ignore the 6 please – this should now be track 1 – By clicking this icon we can make this Track a Folder and everything below will become part of the Folder.
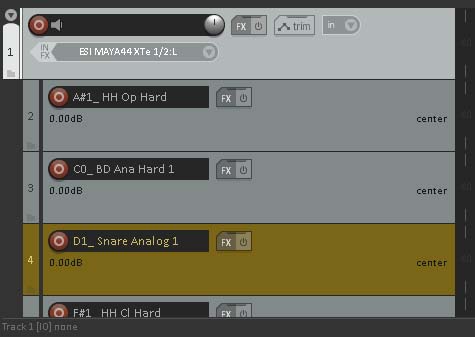
On the last track: Last Track in Folder
Click Folder Icon on the last track and Cyle through until it changes to Track is last in folder.
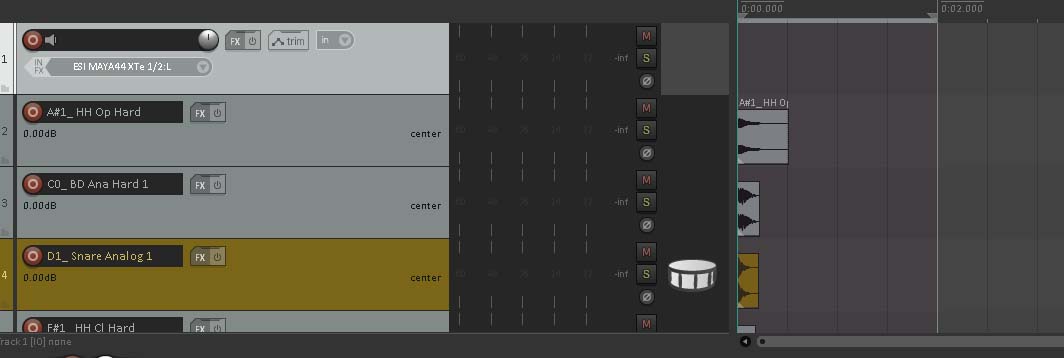
The image now shows the drum sample tracks as part of our newly created Folder.
Drum Track: ReaSamplOmatic5000 Midi Choke Hi-Hat
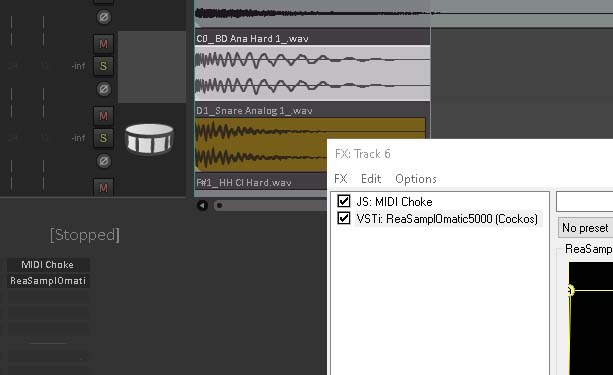
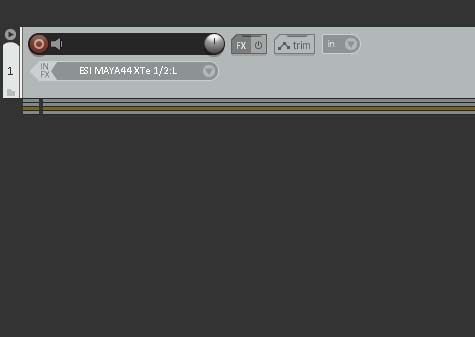
Add a new track – Open FX and add JS:Midi Choke followed by ReasamplOmatic5000
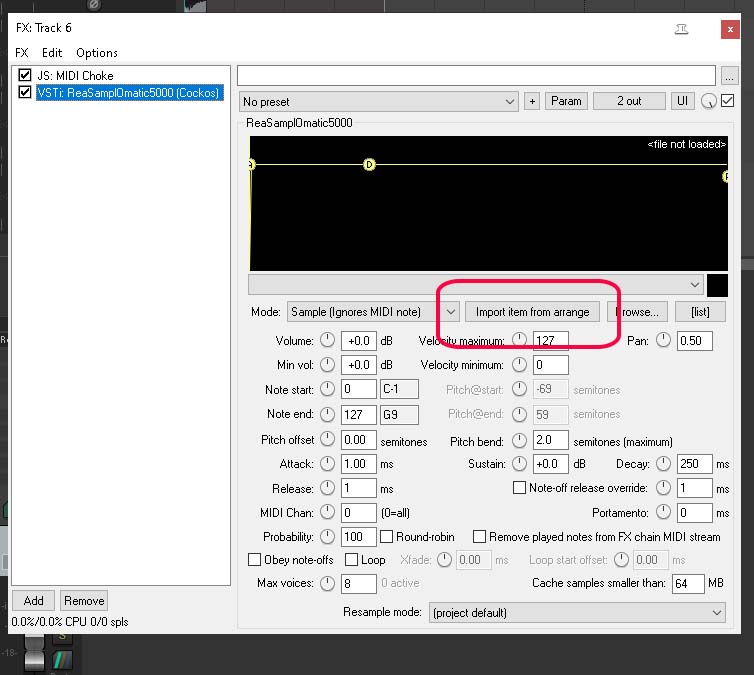
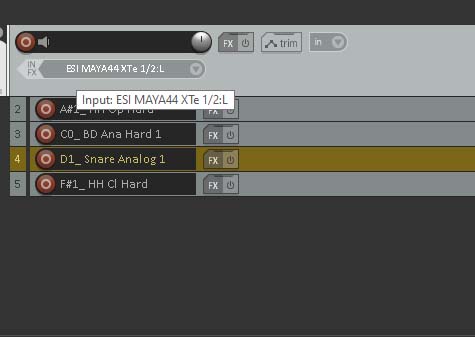
Click on sample on track – ie on the track that contains your kick drum sample click on the media item – now click Import from arrange – this track should now load into ReasamplOmatic5000
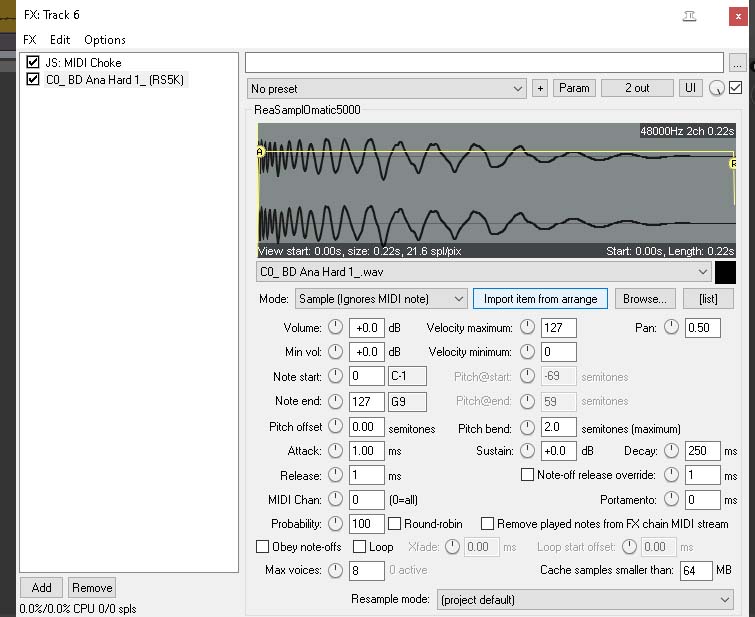
Repeat this for all your imported samples and then follow the steps from Step 1 to create links to notes on keys.
Rename Tracks and Folders:
Double Click in the highlighted space and enter your name for the folder. In this example I’m going to rename the Folder – Samples

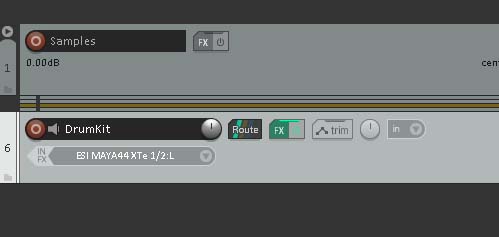
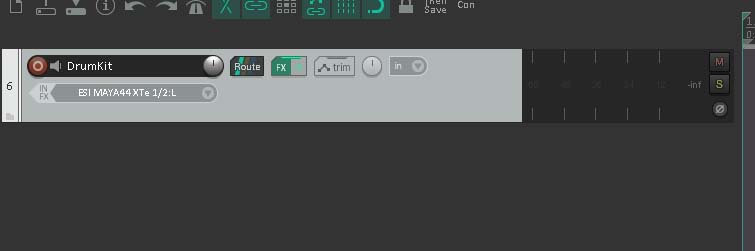
Rename Track with ReasamplOmatic5000 on it to DrumKit – this is useful later on.
Collapse Folders: Shrink folders

By clicking the highlighted icon you can make the child tracks in the folder smaller – making a screen estate much easier to view
EXAMPLE 1: Folder Small
EXAMPLE 2: Smaller
Now we have our Folder with our samples organised and loaded into ReasamplOmatic5000 we can now mute the samples folder and hide all the tracks.
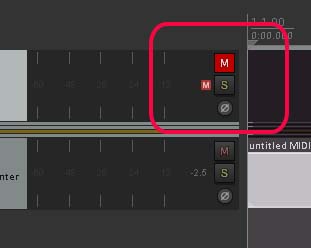
We don’t want the samples to play so let’s mute the Samples folder.
Hide Tracks/Folder
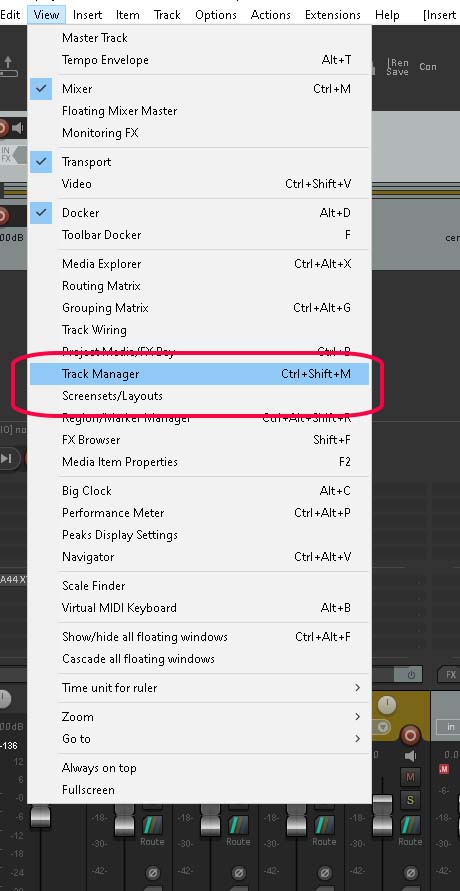
From the Menu bar select View and Open Track Manager.
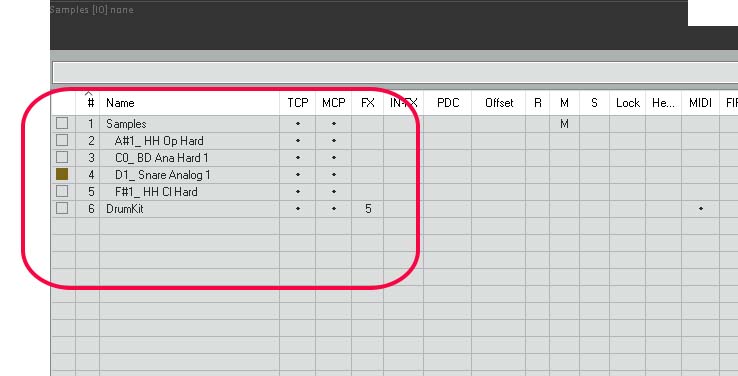
In the image you can see multiple columns: The columns that we are interested in are Name, TCP and MCP Name=Track TCP = Track View MCP=Mixer View. This all have a dot to indicate that these tracks are seen in each of these windows – to hide our tracks we need to remove the dots from the tracks that we want to hide.
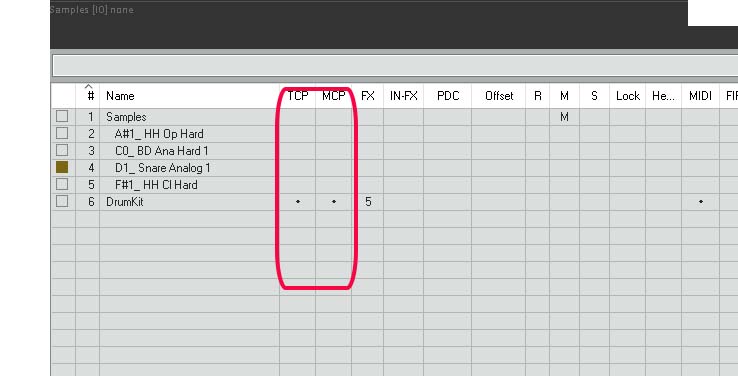
As you can see I have edited Track Manager to only show Track 6: DrumKit
Now we only have Track 6 Viewable – this makes things much tidier to start creating music.
Saving Drum Kit:
If we want to use our drumkit elsewhere or share we can save it as a project.
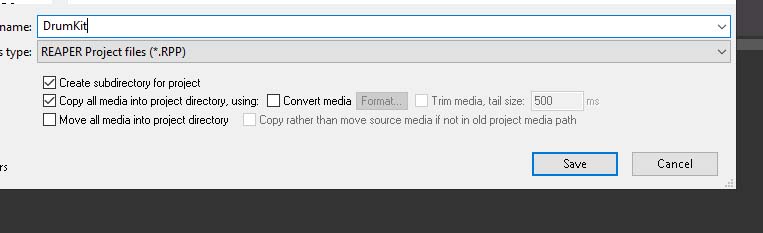
Make sure your save screen matches the image – Create subdirectory for project should have a tick and Copy all media into project directory should also be ticked – give the project a name – ie DrumKit
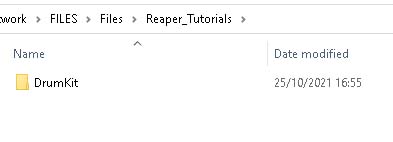
If you navigate to your saved project you will find a folder with name of your saved file – open this folder
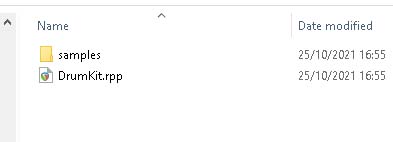
In this Folder you will find the following: samples folder and a rpp file in this instance named DrumKit.rpp – Double click the samples folder.
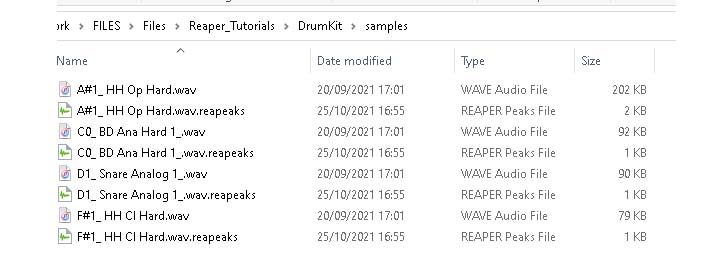
Inside this folder you will see all the samples you imported into Reaper. This keeps all your samples in the project just in case you have to move or share the project.
You could also make a track template which you can use in another project.