Roland D-110 TONE EDITING
Part 2 – Editing Procedure
* The editing procedure does not automatically rewrite the existing Tone, and therefore will be erased by selecting a different Patch, Timber or Tone. Towrite the edited Tone in memory, take the Tone Writing procedure.
[Selecting a Tone]

Step 1 – Push TIMBRE.
Step 2 – Select the Timbre that contains the Tone to be edited.
To select a Timbre which is assigned to any Part, assign that Part with the Part Select Button.
To select a Timbre which is not assigned to any Part, you can use any Part.
Step 3 – Push EDIT.
This calls the Tone Select Display in Timbre Edit.
Step 4 – Select the Tone to be edited with PARAMETER/BANK ![]() and VALUE/NUMBER
and VALUE/NUMBER ![]() .
.
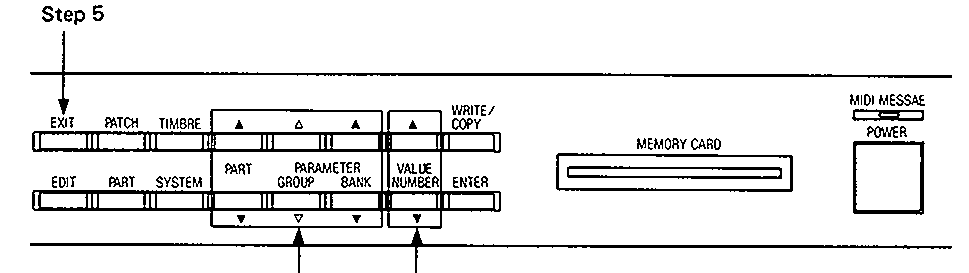
Step 5 – Push EDIT.
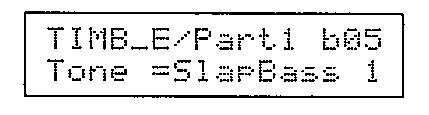
This turns the unit to the Tone edit mode and selects the Tone Name Display.

Go to the next section “Editing a Tone Parameter”.
[Editing a Tone Parameter]
Step 1.
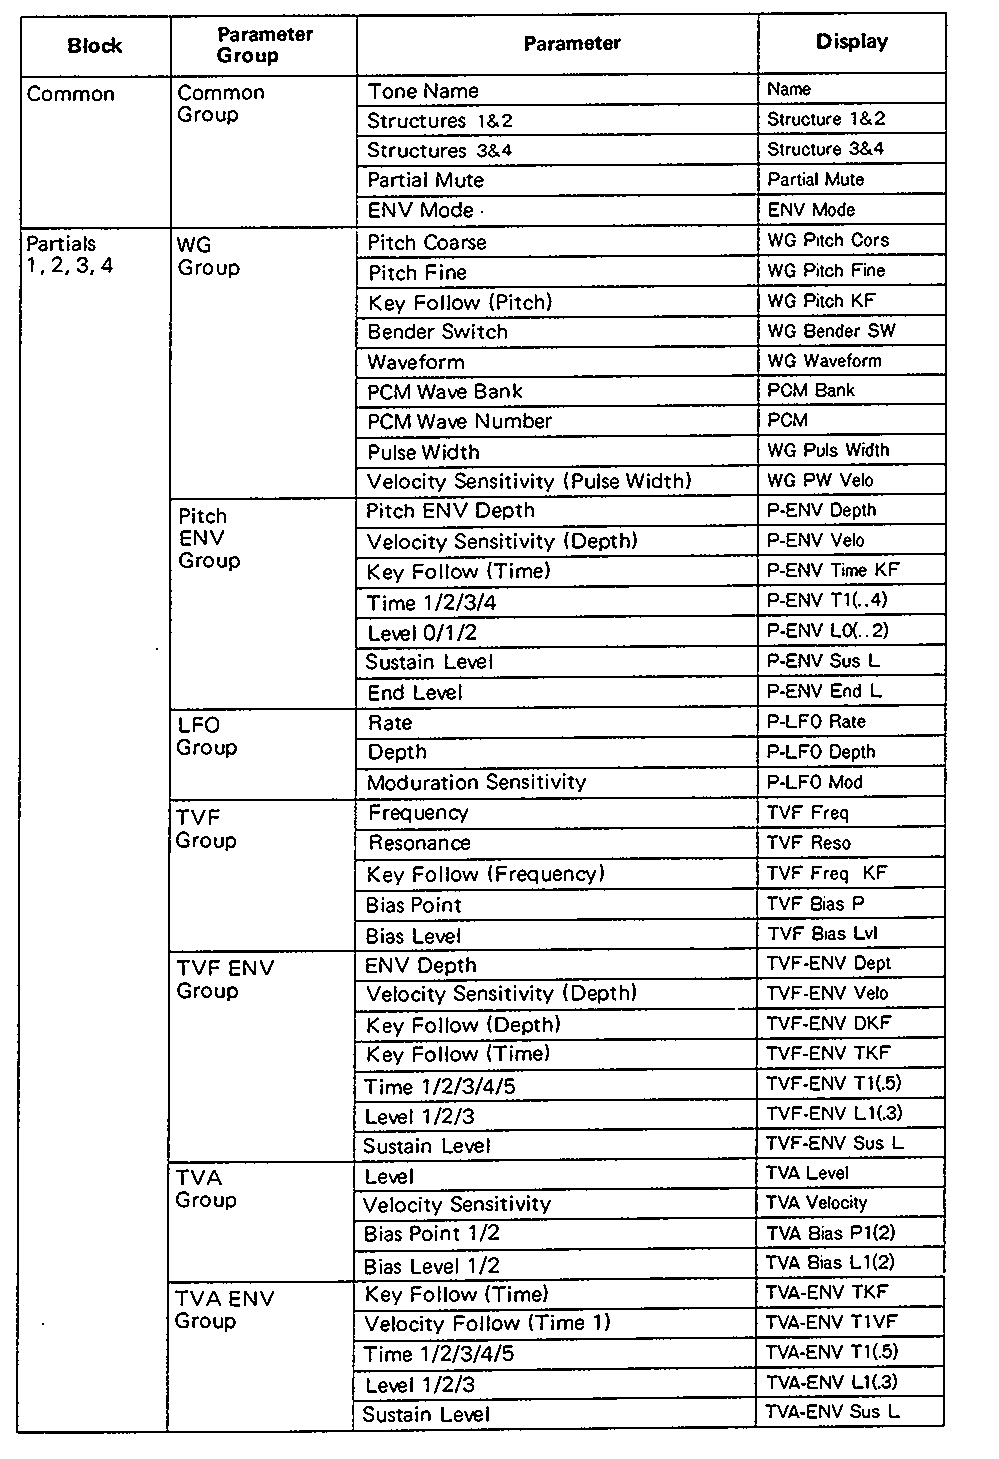
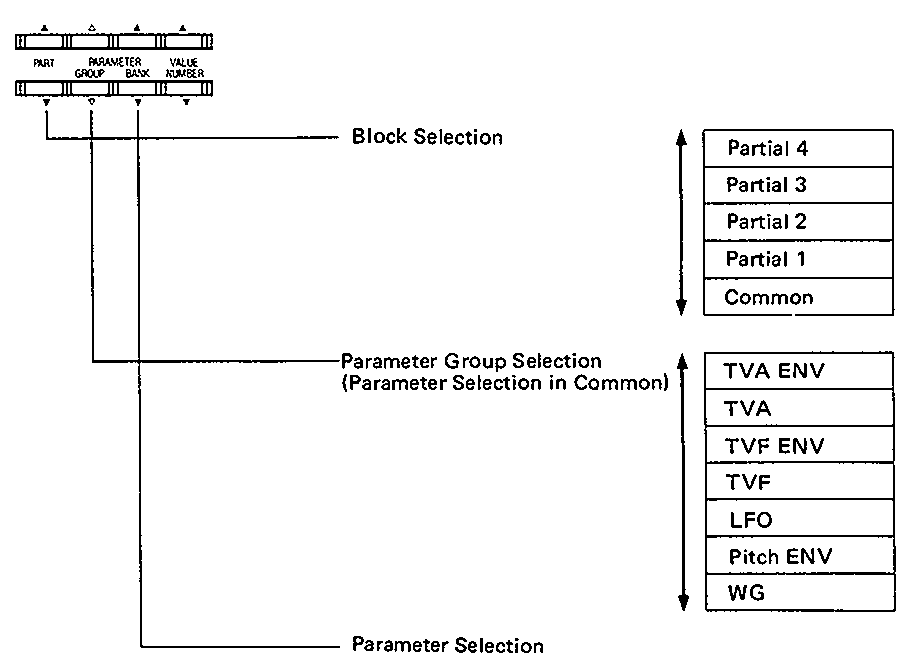
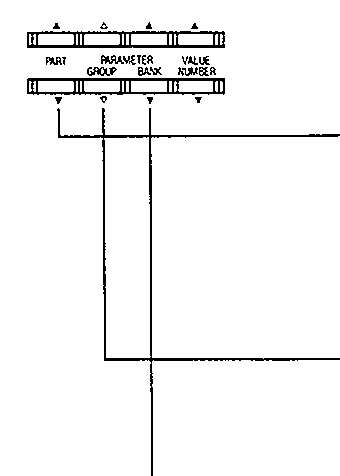
A Tone is represented with a Block (COMMON, PARTIALS 1 to 4) and a Group and a Parameter. First, select the Block with PART  , then the Group with PARAMETER/GROUP , then a Parameter with PARAMETER/BANK
* Common parameters have no Group division. So after selecting the Common Block, assign the Parameter Number with PARAMETER/GROUP.

Step 2 – Change the value with VALUE/NUMBER .
Repeat Steps 1 and 2.
Step 3 – If you wish to write the edited Tone, follow the Tone Writing procedure.
Step 4 – When finished, push EXIT three times to return to the Play mode.
* Pushing EXIT twice will retrieve the Timbre Select Display.